
Docker lets you run software services, programs, and application environments inside containers. You can run web servers like Nginx, Apache, MySQL, or MongoDB inside of containers that are separate from your operating system and your whole local machine environment instead of building an app on one machine and having to mimic that environment on another machine especially if it’s a different operating system. Docker completely gets rid of these processes because you can simply run it in a container and it’s going to be the same no matter what machine (Mac, Linux, Windows) you run it on.
Virtual Machine vs Docker

In a Virtual Machine (VM), you have your host machine or your server where you run multiple virtual machines. Virtual machine has its own full-blown operating system and kernel where you are running your APPS on top of those operating systems. With Docker, however, we have our server or host machine with one operating system (Windows, Mac, or Linux) and you have these tiny containers that run which are nothing but processes that run on your machine and they all share a kernel, even though containers have mini Linux distributions like Debian or Alpine.
Here are just some of the benefits of working with Docker rather than virtual machines:
- There’s much less overhead working very easy to port to other machines
- Fast deployment
- Docker Containers occupy less space
- They have a better performance as they are hosted in a single Docker engine
- containers are easy to scale with high efficiency
- Data volumes can be shared and reused among multiple containers
Docker commands for troubleshooting are very important and useful, especially when something goes wrong in your container. If there are any issues, you would want to see the logs of your container or you want to actually get inside of your container to see your terminal and execute some commands within it.
Docker Image is a part of a container runtime. A container is a running environment for an image. The application image that runs the application could be Postgres, Redis, or some other application that needs a file system where it can save your log files or where it can store some configuration files. It also needs some environmental configuration like environmental variables. All of your environmental configurations are provided by the container and the container also has a port that is binded to it, which makes it possible to talk to your application which is running inside of a container. You can have multiple containers running simultaneously on your host, which can be your laptop or desktop.
In this tutorial, I will show you how to debug your container using various docker commands.
Steps
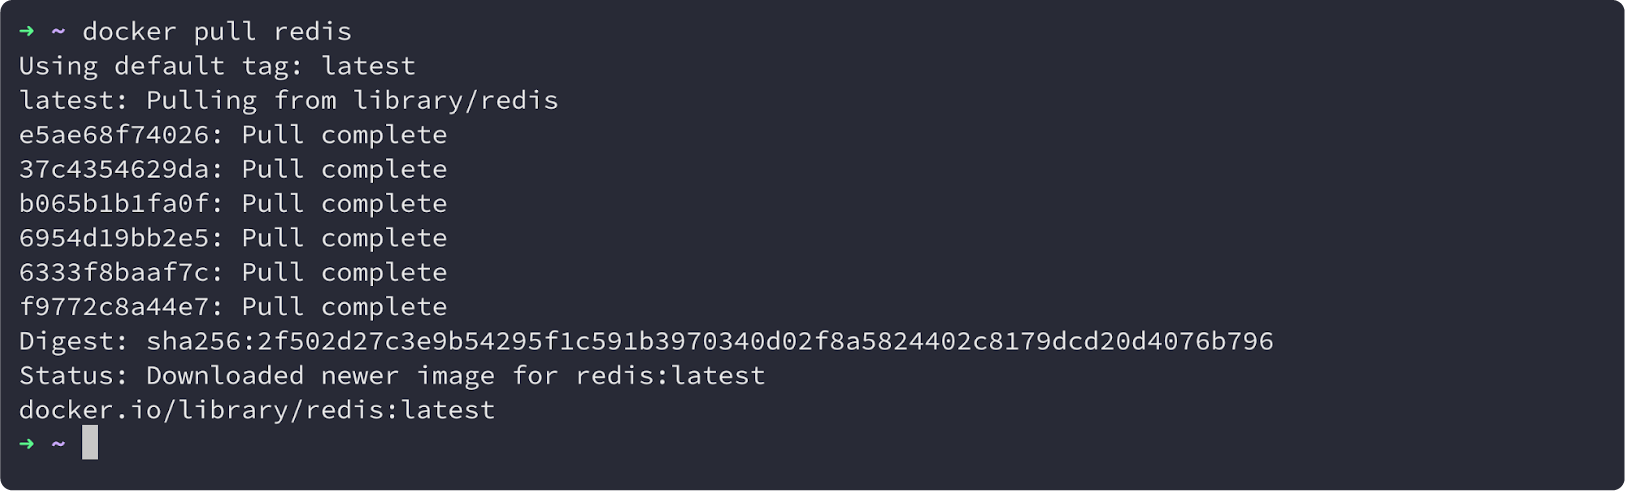
- Let’s pull a Redis image out of the docker hub to our local machine. When you pull an image, it will take some minutes to pull.
2. Once the download is complete, you can check all the existing images on your computer using docker images command.
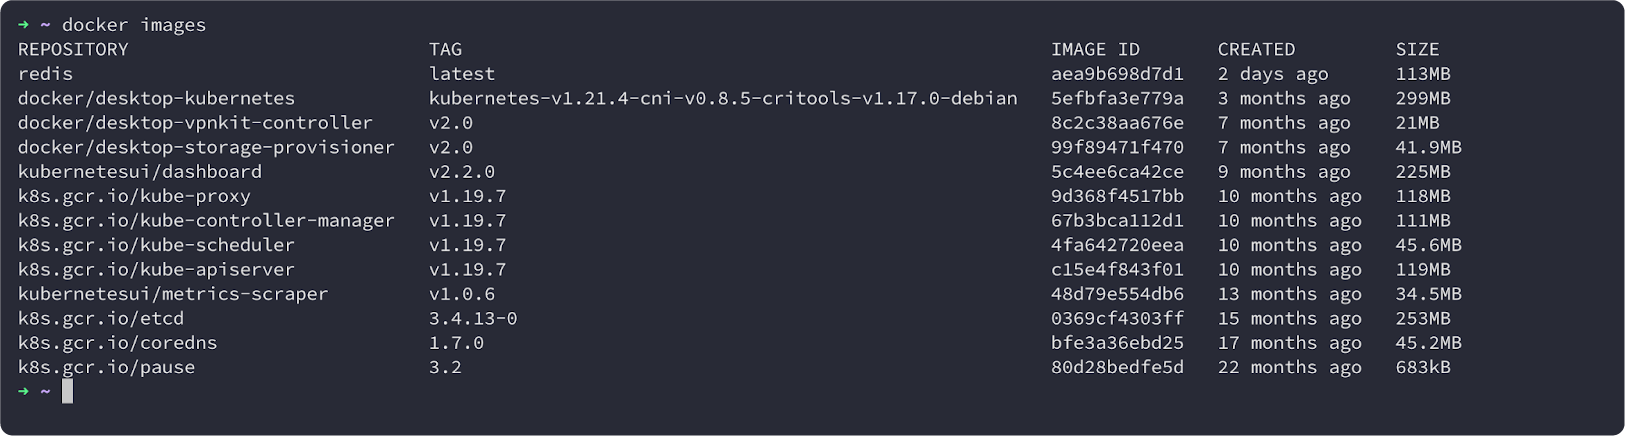
You can see that I have over ten images here with tags, image ID, when it was created, and size. Images have tags and versions.
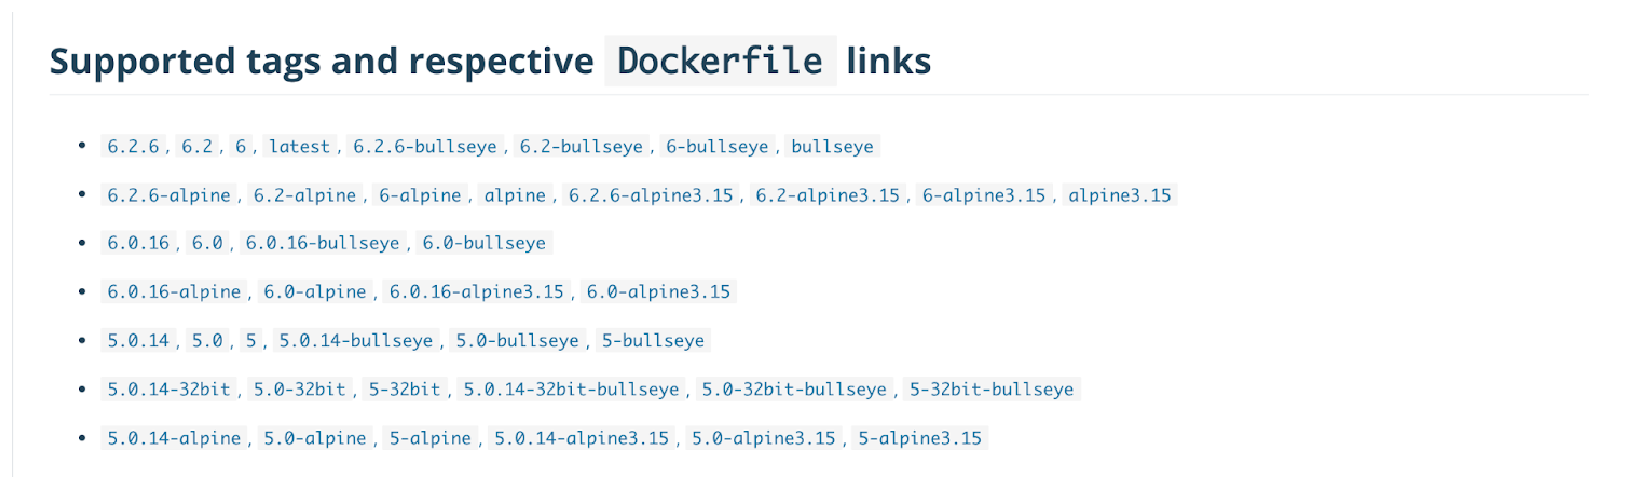
For example, if you go back to the docker hub, each image that you look up in the docker hub will have many versions. The latest is always the one you get when you don’t specify the version.
3. Next, run Redis. You need to run Redis so that your application can connect to it. You will have to create a container of your Redis image that will make it possible to connect to your Redis application. Use the docker run redis command to start your image in a container.
- As we said earlier, the container is a running environment of an image. The
docker run rediscommand will start the Redis container in the terminal in an attached mode.

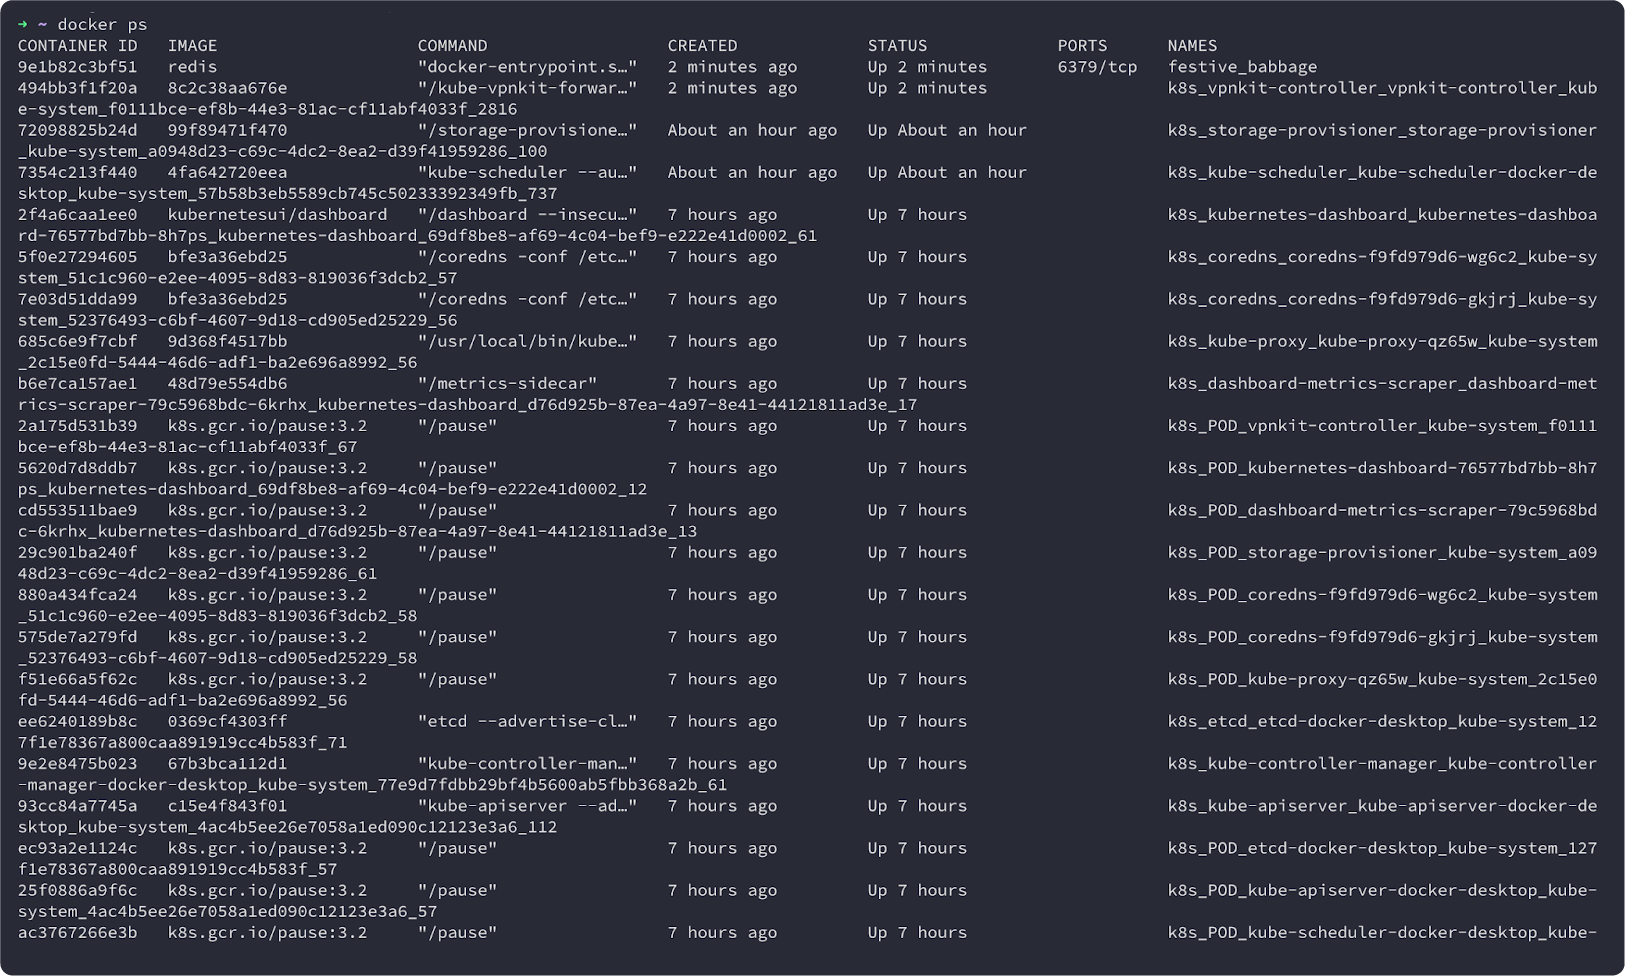
4. Open a new tab and enter docker ps you will see the status of all the running docker containers. So you can see the container Redis is running with a container ID based on the image of Redis and port 6379.

5. Next, run your container in a detached mode using docker run -d redis you will see and get the ID of your container as an output and the container will start running.

- Check again to confirm if your container is running using
docker psyou will see the container ID is the same as when you ran it in detached mode.

6. If you want to restart your container because it crashed or some error happened, you would need your container ID. You can stop your container after an error has occurred using the docker stop command docker stop <container_id>

- After you have successfully stopped it, you can now start it up once again using the docker start command
docker start <container_id>

7. You can get the list of all the containers that are running or not running by typing the docker ps -a command in your terminal and starting your container using docker startcontainer_id
8. If you have two parallel applications that both use Redis but in different versions, you would need two Redis containers with different image versions running on your laptop at different times or at the same time.
- Let’s get a new Redis image 4.0. To pull a new Redis image, use
docker run redis:4.0, this will pull the image and start the container right away. It does two commands (docker pull & docker start) in one. You will see that some layers are downloaded and the container is starting right away.

- if you enter
docker psin your terminal, you should see two Redis containers running.

9. In the output section, you will also see the port section which specifies on which port the container is listening to for the incoming request. Both containers open the same port which was specified in the image. Your local machine has certain ports available for you to open for different applications. For you to use both images, you would need to bind your container port to two different ports on your host machine. Once the port binding between the host and your container is already done, you can connect to your running container using the port of your host.
- Before you can specify your binding using the run command, you need to stop all your containers using the
docker stopcommand. - Start your containers using the binding between the hosts and the container ports. You have two different Redis containers so you need to bind them to two different ports on your local machine using
docker run -p <port_of_the_host>:<container_port>
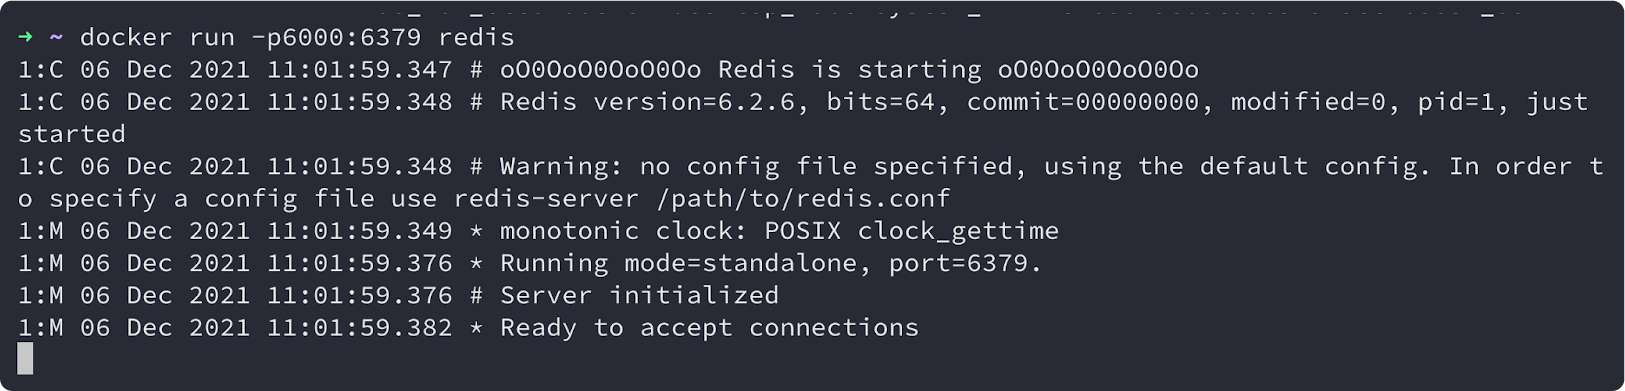
- Confirm to see which processes are actively running. In the port section, you will see the binding your local machine port 6000 is bound to the container 6379

- Start your bounded container in a detached mode.

- If you try to run the second Redis container with the same port you will get an error telling you that the port is already allocated.

- Change your host port and try again.

- Next, check your container processes. You will see different Redis versions running and both of them bound to different ports on my laptop, and the containers themselves listening to requests on the same port.

Docker exec and Docker logs
If something happens in your container and your application cannot connect to Redis, you would want to see what logs Redis is producing. To see the logs in your container use the docker logs command docker logs <container_id>

- You can also get your logs using the name of your container.

- When you create a container, it is assigned a random name. You can rename your containers as you wish using
docker runwhich will be very useful sometimes if you don’t want to work with the container IDs and you just want to remember the names of if you just want to differentiate between the containers.
- To do this, create a new container from Redis 4.0 using a different name using
docker run -d -p6001:6379 --name redis-older redis:4.0. This will create a new container since we are running thedocker runcommand.

- When you confirm the process, you can see it has been created, and the name is
redis older.

- Repeat the same process for the second Redis container.

- Confirm if your containers are running using
docker psYou will see the latest and older containers you just created.

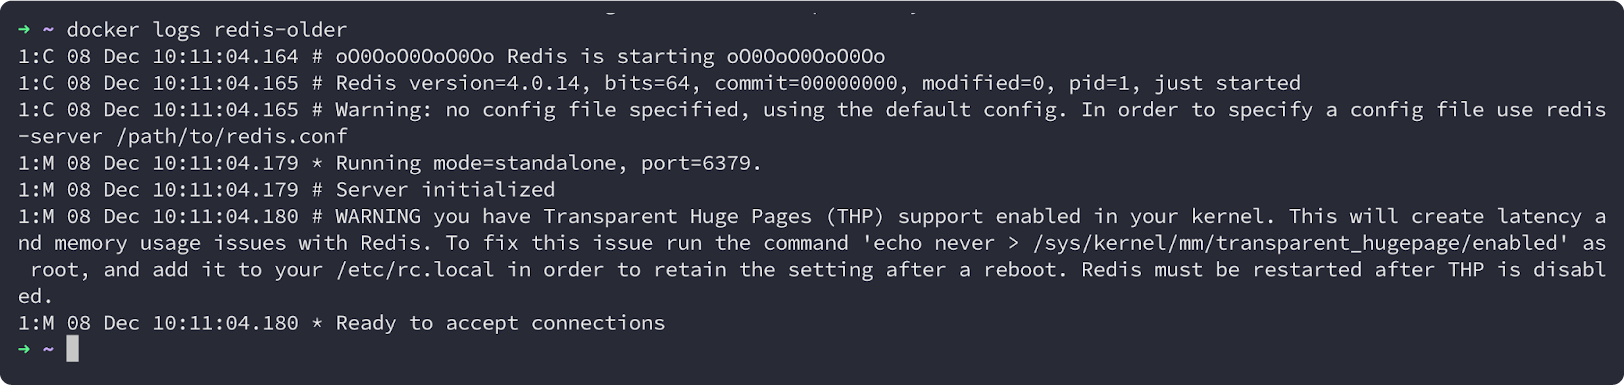
- If the older version has some problems, you can retrieve the logs using
docker logs redis-older
Another very useful command in debugging is docker exec With docker exec we can get the terminal of our running containers.
For example, if there is a problem with the redis latest container and you want to get a terminal of that container, navigate the directories inside the container, check the log file, get the configuration file or print out your environmental variables, you would need to use the docker exec command.
- For you to perform this process, in your terminal type
docker exec -it <containder_id> or <name_of_container> /bin/bashthis takes you inside of your container as a root user.itstands for interactive terminal.

- Next, you can print out the directory you are using
pwdgo to your home directory, see the folders and files in your home directory. You can also see your virtual file system inside your container.

- Print out your environment variables to see if all your parameters are set currently using
env
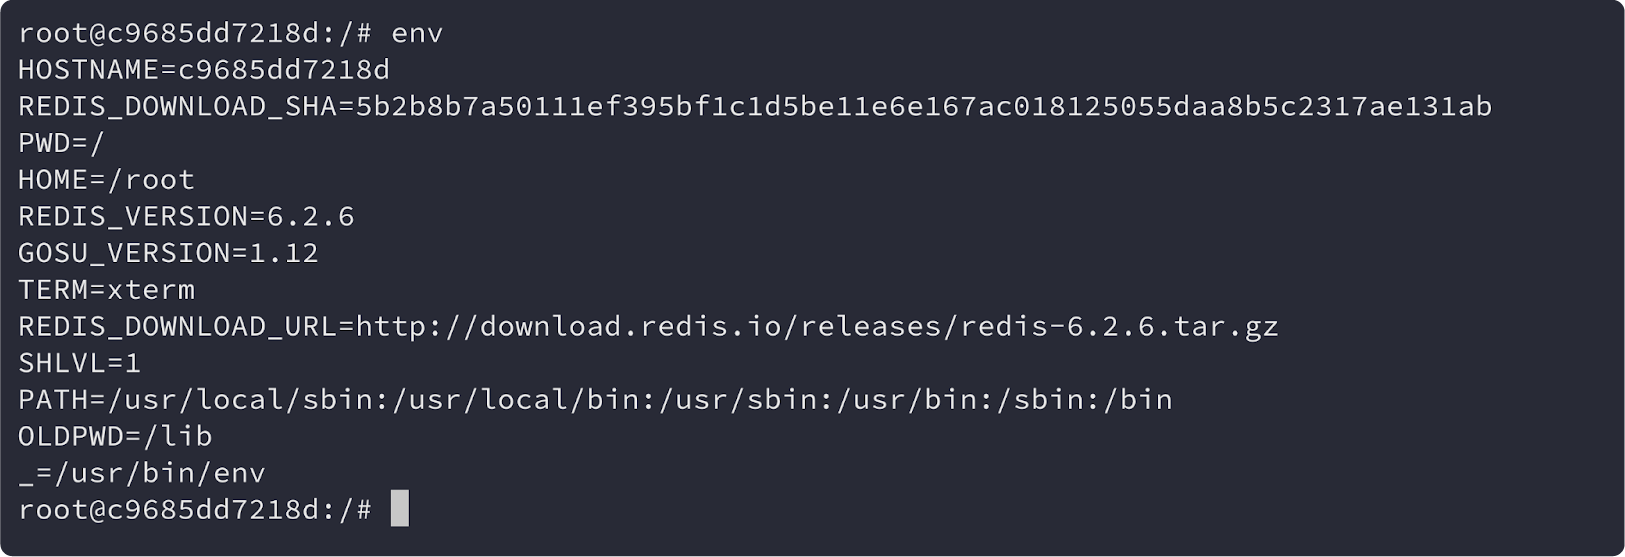
The Docker exec command is very useful if you have a container with some complex configuration or if you are running your own application in a container that has a compound setup and you want to validate that everything is correctly set.
- If you want to exit your terminal, type
exitin your terminal and you will be out.

Since most of the container images are based on some lightweight Linux distributions, you wouldn’t have much of the Linux commands or applications installed like; curl but you can execute a lot of commands and debugging using the docker commands.
CTO.ai is a more cost-effective solution while also enabling your business to increase quality and speed, ultimately delivering more value to your customers.
Leveraging CTO.ai lets you automate all of your cloud-native tooling, create fully-managed CI/CD pipelines that will build, test, and publish your application containers. With our platform infrastructure, you can measure and improve your delivery cadence without worrying about complications, and your organization will be able to instrument their workflows and effectively collect delivery events that provide deep insights into the health of their services.
To get started with CTO.ai, sign up on our platform, or request a demo here.
If you have specific questions or issues configuring the file, I’d love to hear about them. Contact us here or ask a question in the CTO.ai Community!
You can also follow us on Twitter and on our blog. And if you’ve enjoyed this post, please, take a second to share it on Twitter.
Comments