
Introduction
The full meaning of AWS CDK is Cloud Development Kit and it’s transforming the way we test, create, configure, and deploy AWS resources. CDK is a huge improvement over other methods such as creating your resources in the console or using the CLI. AWS CDK is an open-source software development framework that lets you model and provision your cloud application resources using familiar programming languages.
AWS CDK is a drastic improvement over CloudFormation as it allows you to create infrastructure using different programming languages. This means that you have access to things like IDE autocomplete, compile-time warnings, and control flow statements. This enhancement allows you to create flexible and dynamic classes that encapsulate a lot of AWS resources in one statement. AWS provides useful resource templates called Constructs, which you can build and share across your organization. CDK doesn’t create your resources directly, it compiles it down to CloudFormation which then deploys to AWS.
CDK workflow lets you write code and then output a CloudFormation template that then gets deployed into your AWS environment.
In this tutorial, I’m going to show you how to create and deploy your first CDK project.
Prerequisites
Steps
- Firstly, you have to create a directory that will house your CDK files and resources.

2. Initialize your CDK project using the language of your choice, I will be using typescript for this tutorial. The command will also install all the packages needed for your project. Once started, standby while it initializes.

- Our CDK App has been initialized and ready.
3. In your terminal, you will notice that when your application is initializing it gives you some useful commands. These commands will help you run, build, test, and deploy your applications. Also, if you clear your screen you can always type cdk —help in your CLI and it will give you a much more comprehensive command for you to use.

4. When your application is done initializing, open it in any editor of your choice. Back in your editor, the bin directory houses your application resources. It imports the core libraries, creates a new application, and imports the stack.
A stack in CloudFormation is what is created when you import a CloudFormation template.
#!/usr/bin/env node
import 'source-map-support/register';
import * as cdk from '@aws-cdk/core';
import { CdkFirstAppStack } from '../lib/cdk_first_app-stack';

const app = new cdk.App();
new CdkFirstAppStack(app, 'CdkFirstAppStack', {
});
- In your Lib directory, you can see the default stack that is created for you when you initialize your project.
What we are doing here is importing the core CDK and creating a stack from the CDK library.
import * as cdk from '@aws-cdk/core';

export class CdkFirstAppStack extends cdk.Stack {
  constructor(scope: cdk.Construct, id: string, props?: cdk.StackProps) {
    super(scope, id, props);

    // The code that defines your stack goes here

  }
}
- By default, the initialization process creates a
.gitignorefile and initializes a git repository so we’ll actually be able to see the status of your application.
5. Let’s go ahead and create a sample stack. Import s3 from aws-s3 and define your bucket stack.
import * as cdk from '@aws-cdk/core';
import * as s3 from '@aws-cdk/aws-s3';

export class CdkFirstAppStack extends cdk.Stack {
  constructor(scope: cdk.Construct, id: string, props?: cdk.StackProps) {
    super(scope, id, props);

    // The code that defines your stack goes here

    const mybucket = new s3.Bucket(this, 'mybucket');
  }
}
6. Back in your terminal, install the awscdk-s3 package using npm install @aws-cdk/aws-s3
Our s3 package has been installed.

7. We have added our bucket and installed the s3 module, we can go back to the command line and type cdk synth This will output the CloudFormation template that is being created.

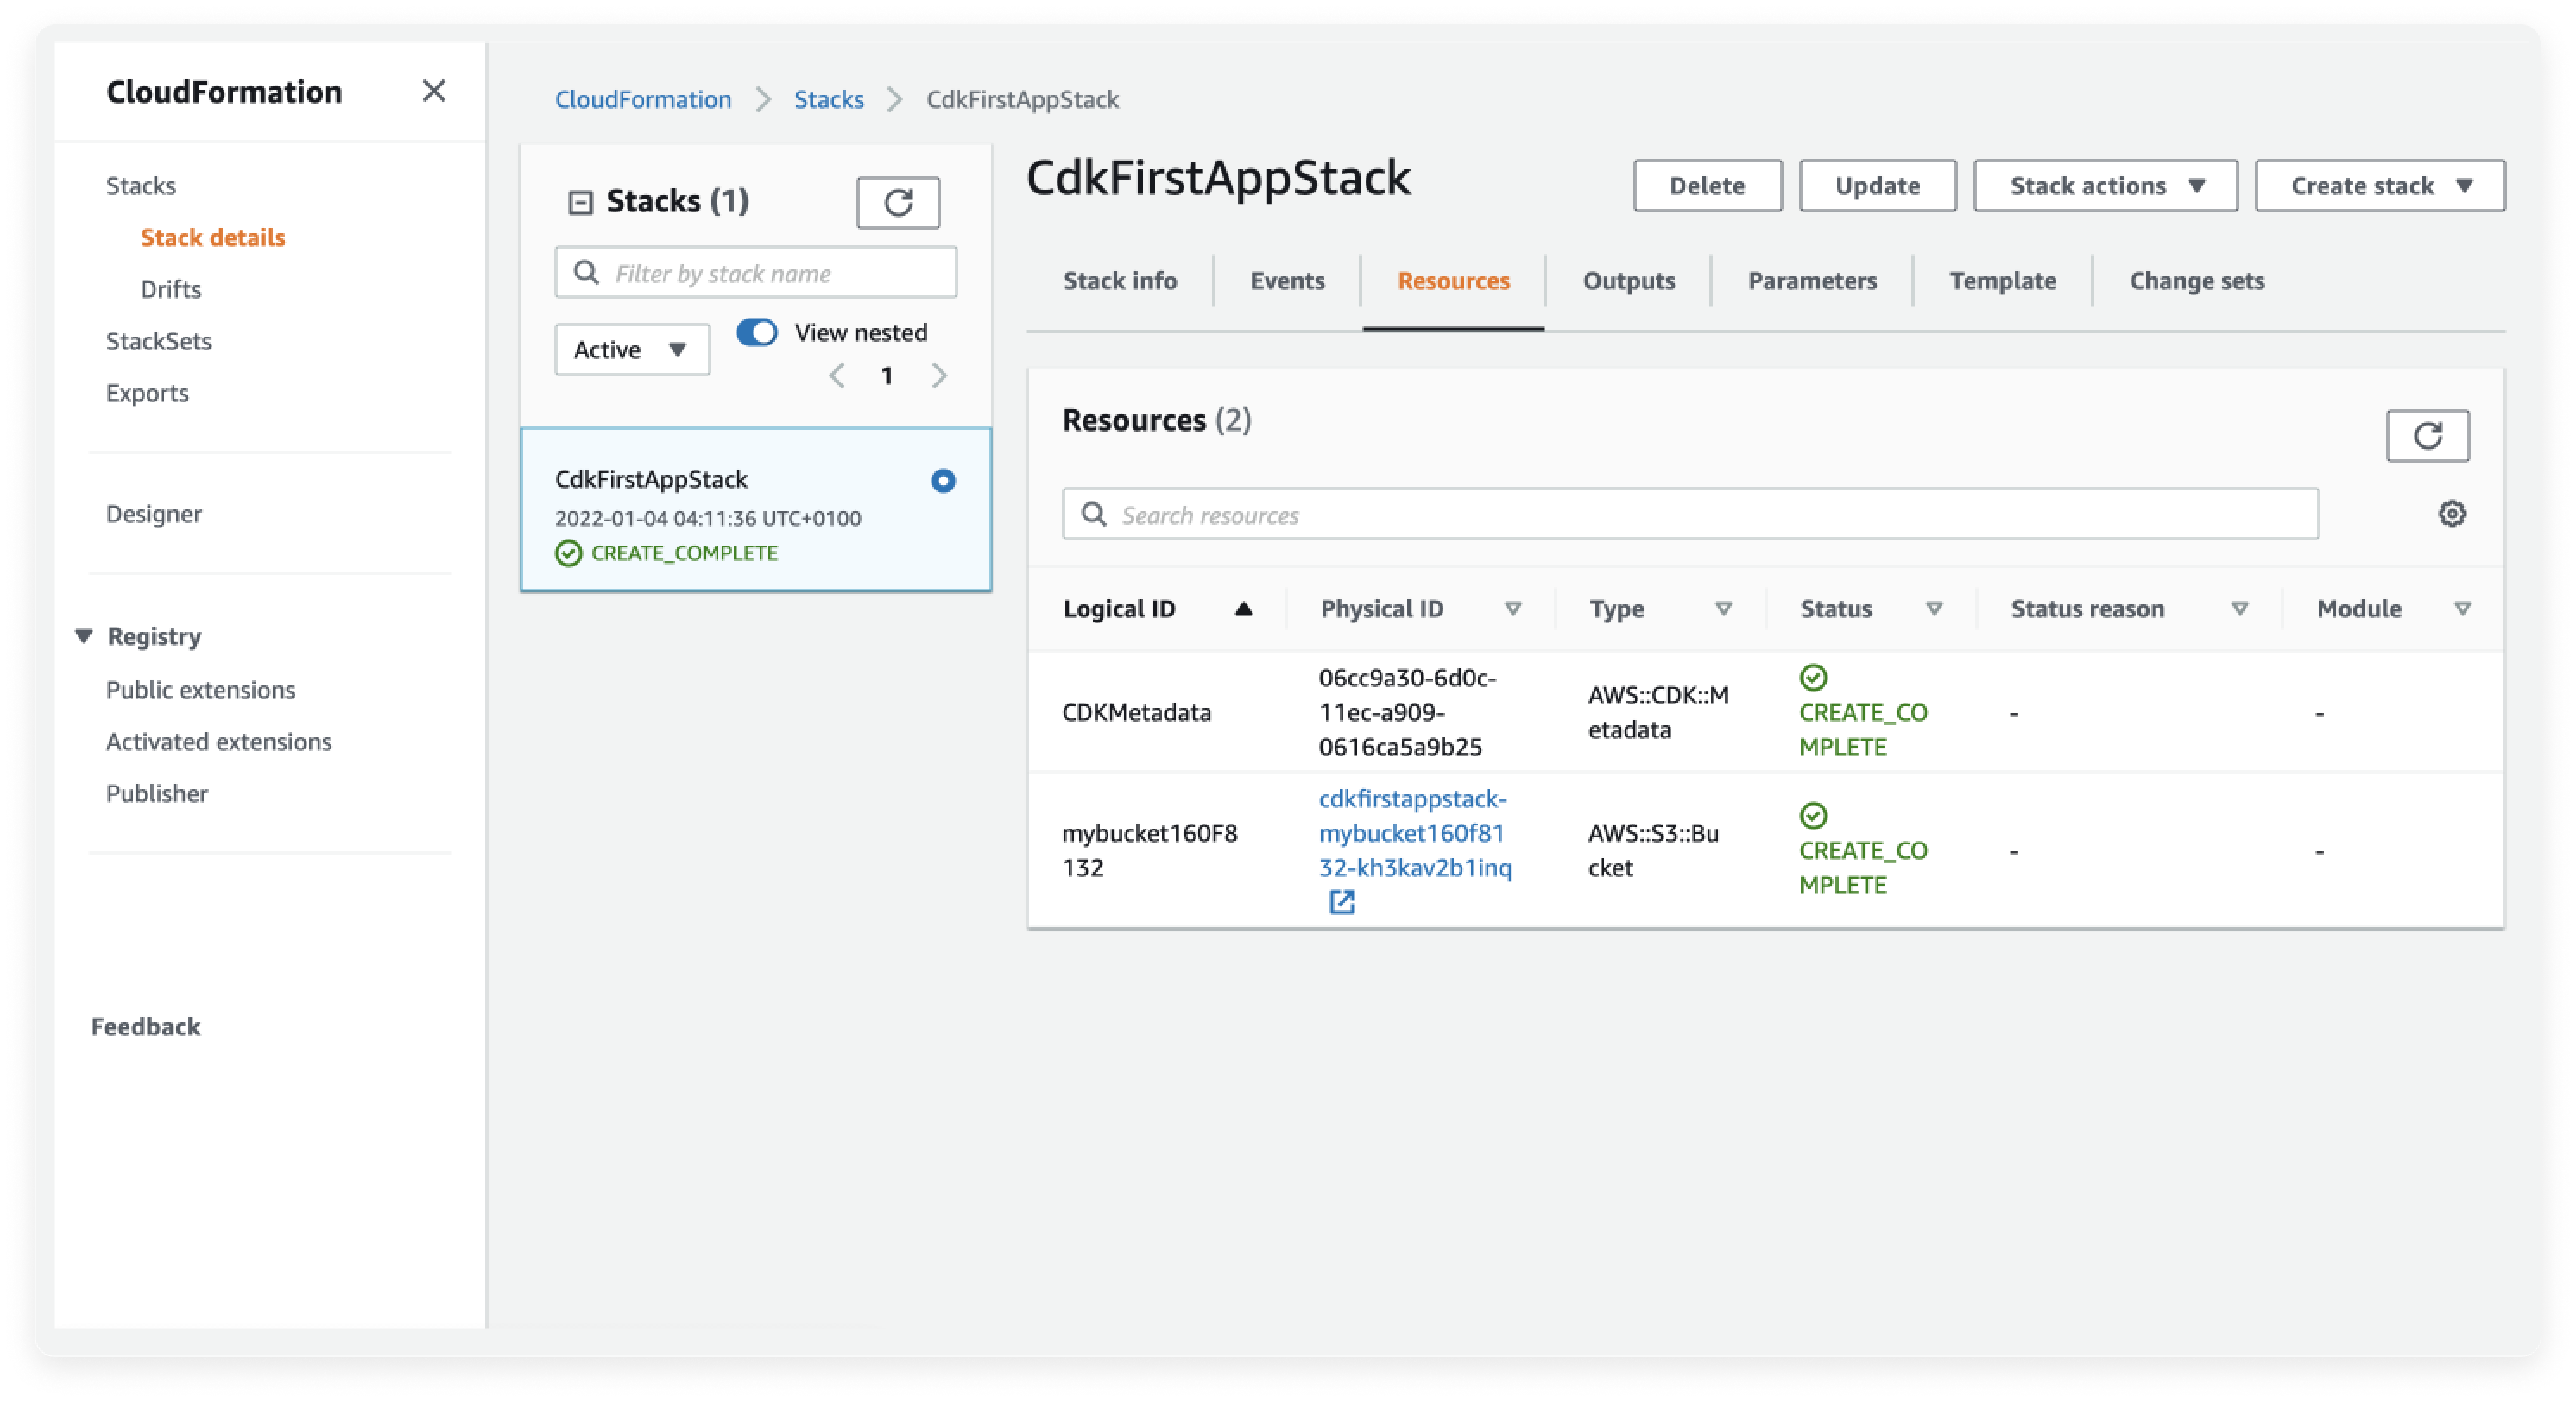
- From the resource template, you can see that it created a bucket and added a bucket policy and CDK metadata.
8. Deploy your resource using CDK with the `cdk deploy` command. You can see it creating your resources.

- The process will be deployed but will only take a few moments. The process has been completed and your S3 bucket has also been created.

9. Back in your CloudFormation console you can see that your stack has been created.
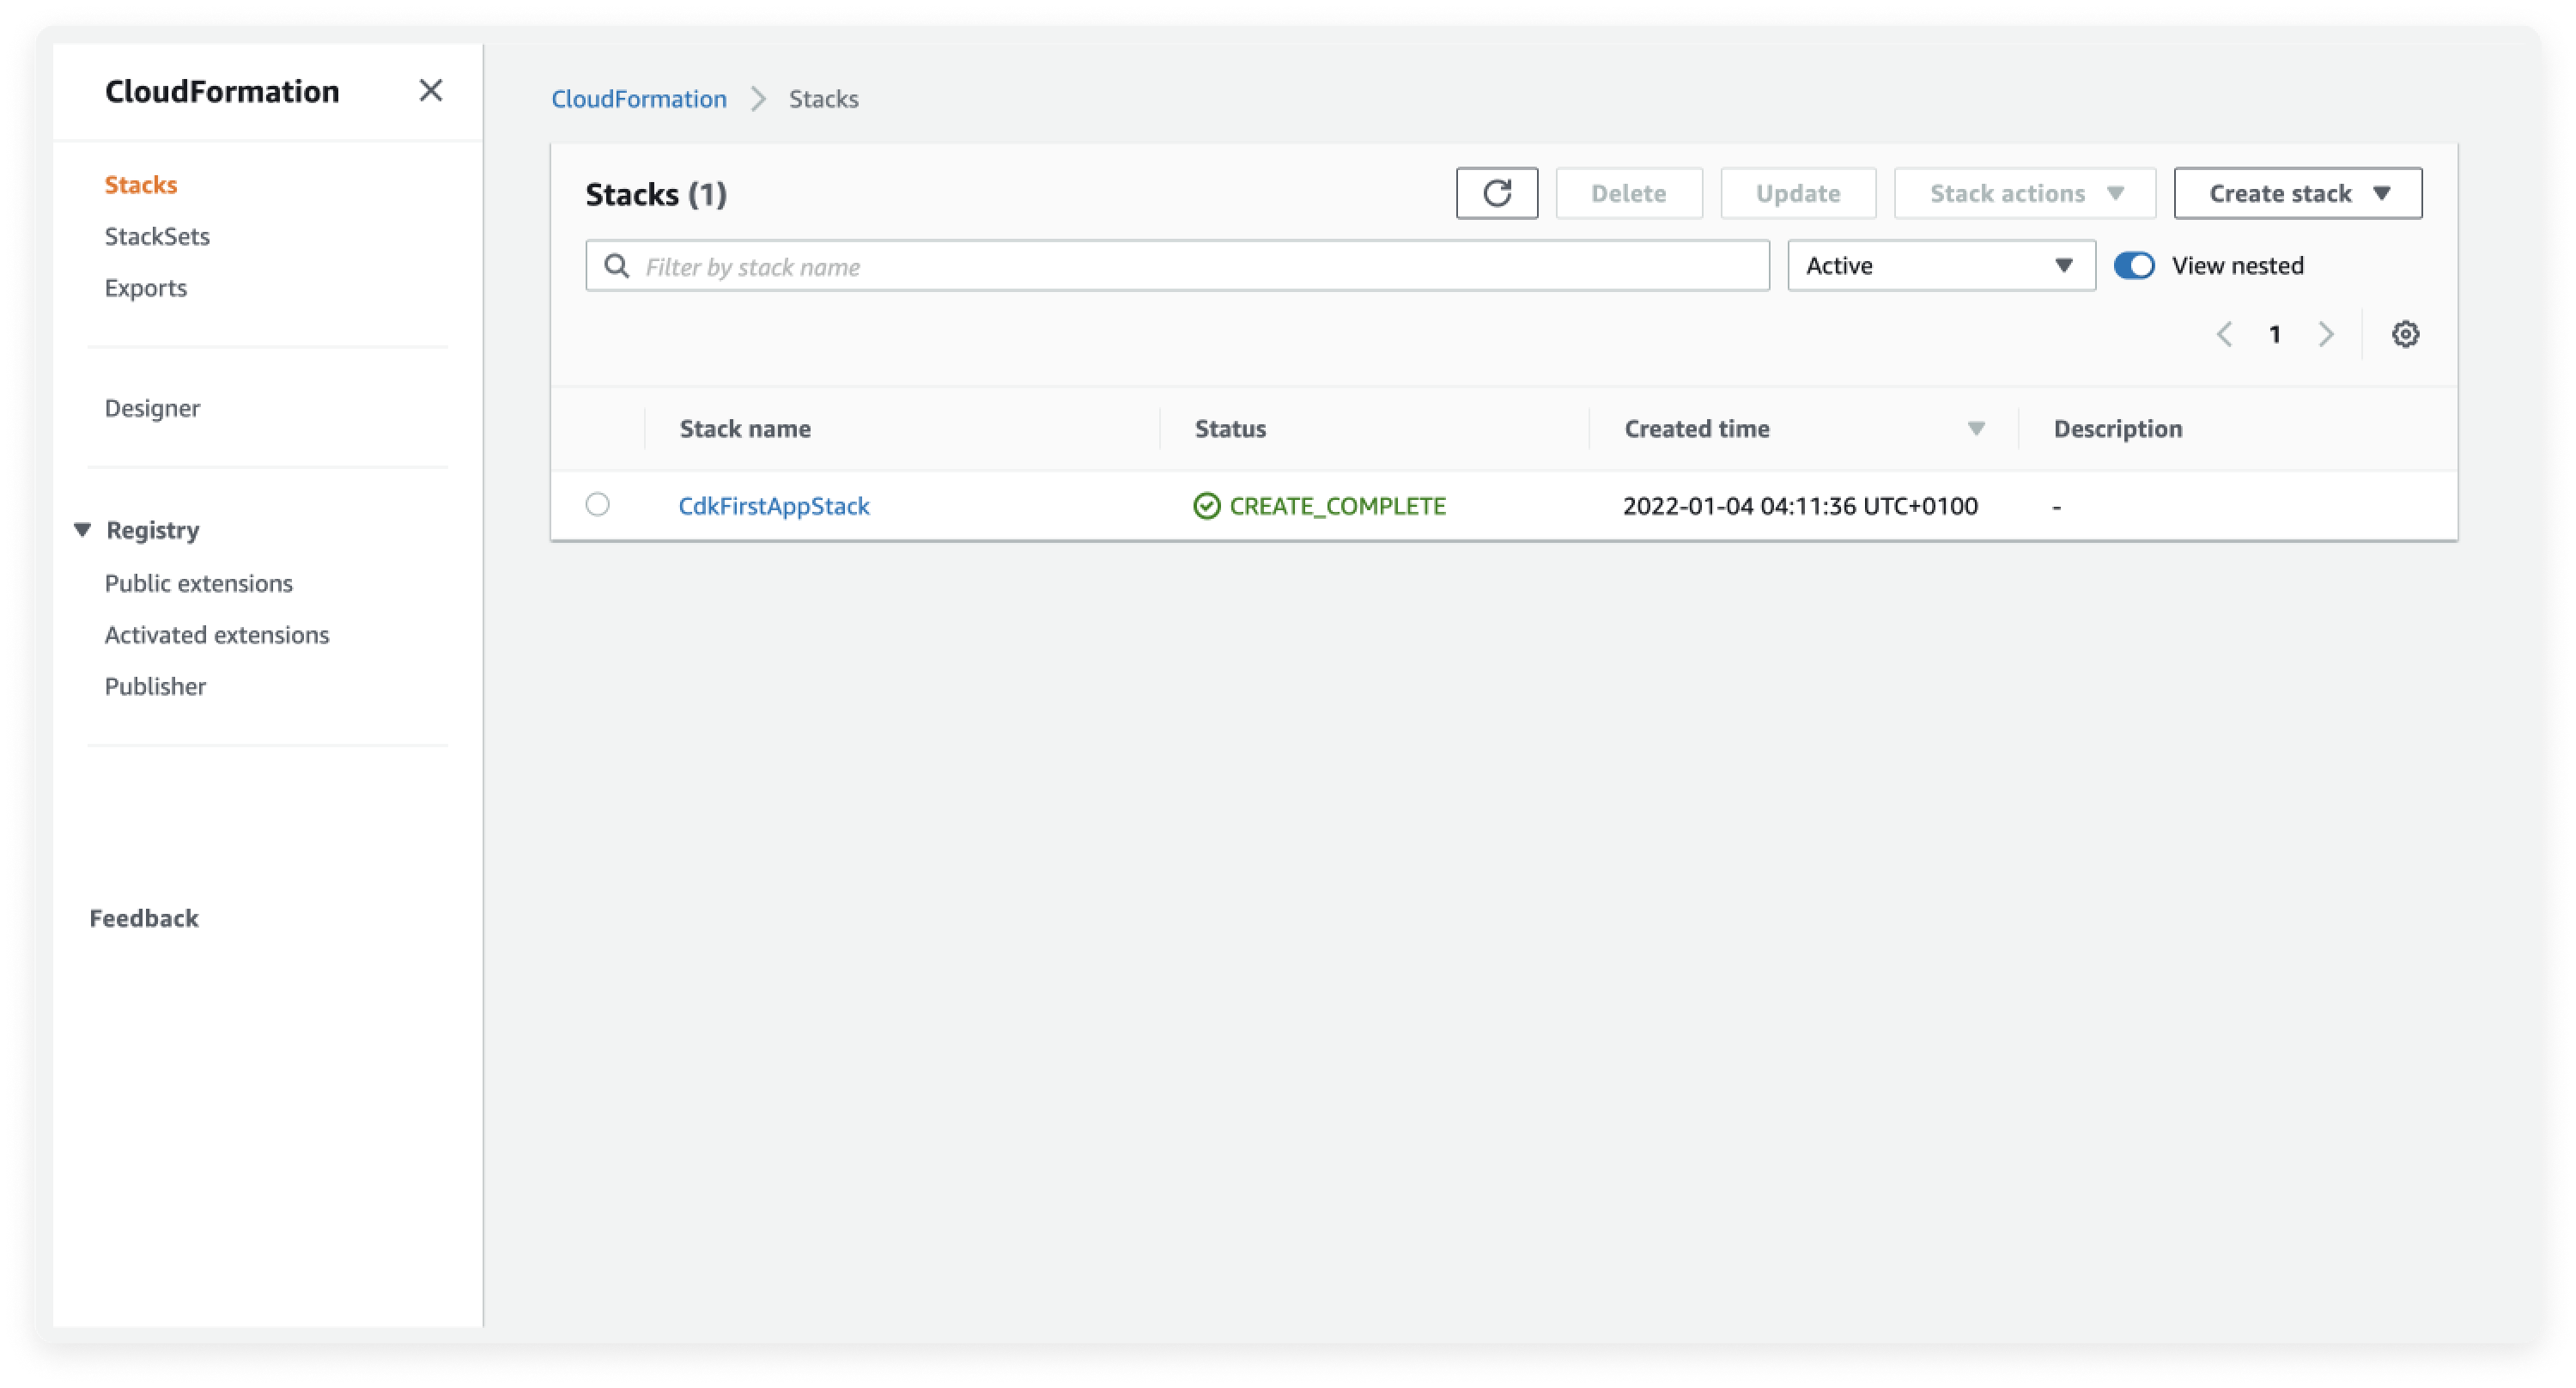
- Click on it to see your events, resources, outputs, parameters, and template.
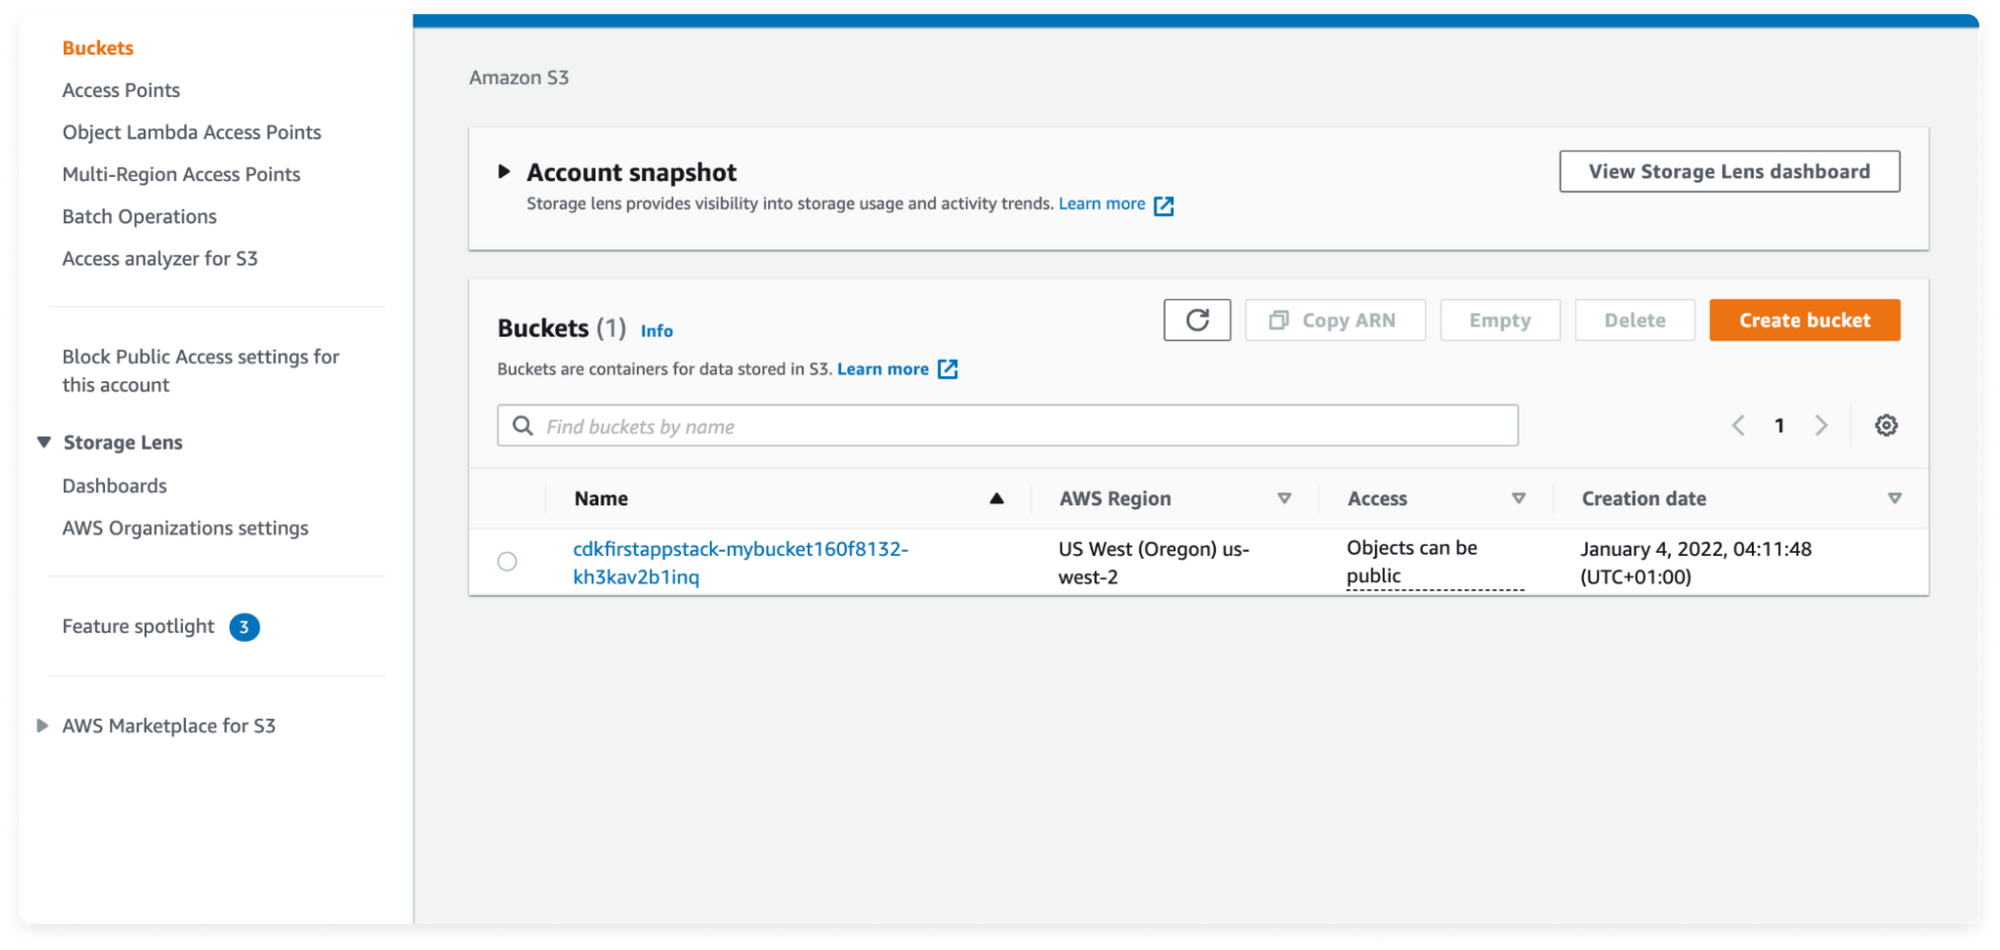
10. Visit your AWS S3 console to see your S3 bucket that has been created.
If you start the deploy process and you accidentally close the browser, it doesn’t stop deploying because the process is created by CloudFormation. So it will be updating in real-time what you are seeing from your browser.
11. When you are done building your application, you can destroy and remove it to prevent additional costs from AWS.

AWS CDK enables you to build your cloud application without leaving your IDE.
You can see how swift and fast it is for you to model your AWS Cloud applications using any language of your choice, provision applications, and accelerate your application deployments on AWS.
Implementing CTO.ai workflow on your CDK projects you will be able to build cost-effective, highly reliable, and scalable pipelines and deployments across all your projects without worrying about creating and configuring the underlying infrastructure.
You can visit our website to get started or you can also sign up on our platform, or request a demo here.
If you have specific questions or issues configuring the file, I’d love to hear about them. Contact us here or ask a question in the CTO.ai Community!
You can also follow us on Twitter and on our blog. And if you’ve enjoyed this post, please, take a second to share it on Twitter
- You can view the Source code for the Sample Application on the GitHub Repository here
Comments