
In today's world, software development is not just about writing code. It's also about creating efficient processes that enable collaboration, minimize repetitive tasks, and improve productivity. This is where automation comes in, specifically, the cloud delivery developer workflow Platform by CTO.ai.
CTO.ai is a workflow automation platform that allows developers to build, share, and run workflows from the dashboard and terminal. The CTO.ai Ops CLI (Command Line Interface) is a powerful tool that allows developers to automate tasks right from their terminal without the need to switch contexts. In this blog post, we will delve into creating automated workflows using the CTO.ai Ops CLI.
Getting Started with CTO.ai Ops CLI
First, you need to install the Ops CLI. You can do this by running the following command in your terminal:
npm install -g @cto.ai/opsAfter the installation is complete, you need to sign up and log into the CTO.ai platform. You can do this by running the following command:
ops account:signinOnce you have an account and are logged in, you can create your automated Workflow.
Creating Your First Automated Workflow
To create your first automated workflow, you can use the ops init command. This will prompt you to select your workflow, and provide a name and description for your workflow. For example:
ops init
In this tutorial, we will be creating automated workflows using CTO.ai pipelines.
- Enter the name and description, and version for your pipeline workflow.

The ops init command creates a new directory with the same name as your workflow and sets up a basic structure within that directory. The main file in this structure is the ops.yml file, which contains the configuration for your workflow.
Building Your Automated Workflow
A workflow is essentially a Docker container, meaning it can contain any code that can be run within a Docker container. The code for your workflow goes into your directory. The code will be in your ops.yml file. In your ops.yml file, your pipelines can look like this:
version: "1"
pipelines:
 - name: automated-workflows:0.1.1
   description: automated-workflows
   env:
     static:
       - DOCKER_REGISTRY=ghcr.io
       - GITHUB_ORG=my-org-name
       - GITHUB_REPO=my-repo
     secrets:
       - DOCKER_REGISTRY_USER
       - DOCKER_REGISTRY_PASS
   jobs:
     - name: automated-workflows-build
       description: example build step
       packages:
         - git
       steps:
         - echo "automated workflows"
The code block above appears to be a YAML file for a Continuous Integration/Continuous Deployment (CI/CD) pipeline, which is an automated process for building, testing, and deploying code. Let's break it down:
version: This denotes the version of the pipeline specification. "1" is the current version in this instance.pipelines: This is an array that contains the definition for one or more pipelines. In this example, there's only one pipeline defined.name: This is the name of the pipeline along with its version. In this case, the pipeline's name isautomated-workflows, and the version is0.1.1.description: This is a brief description of what the pipeline does. Here, it's simply given the same name as the pipeline itself.env: These are environment variables that are available to all jobs in the pipeline. There are two types of environment variables: static: These are hard-coded environment variables. Here,DOCKER_REGISTRYis set toghcr.io,GITHUB_ORGis set tomy-org-name, andGITHUB_REPOis set tomy-repo. secrets: These are sensitive environment variables that are stored securely and not displayed in logs or console output. In this example,DOCKER_REGISTRY_USERandDOCKER_REGISTRY_PASSare expected to be stored as secrets.jobs: This is an array that contains one or more jobs to be executed in the pipeline. In this example, there is one job defined.name: This is the name of the job. Here, it'sautomated-workflows-build.description: This provides a brief description of what the job does. Here, it's described as anexample build step.packages: This is an array of packages that are installed before the job runs. In this case, the git package is installed.steps: These are the commands that are executed when the job runs. In this case, the only step is to printautomated workflowsto the console.
When you are done build your workflow using ops build . command.

Publishing Your Automated Workflow
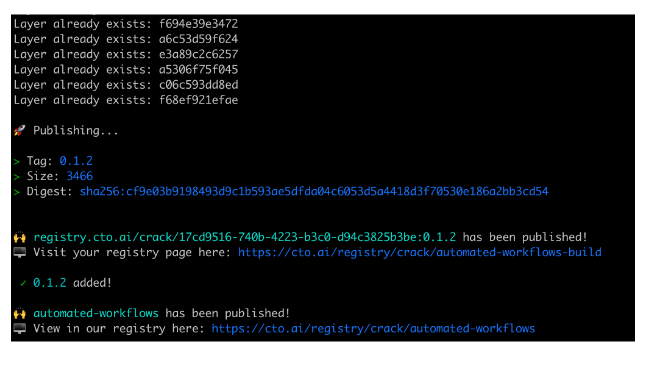
After building your automated workflow, publish your automated workflow using the ops publish . command. The ops publish . command is used to push the workflow image you built from your local system terminal to your CTO.ai registry.
The CTO.ai registry is a repository for Docker images. When you create a CTO.ai image on your local system, it’s only available on your local system. If you want to share the image with others, or if you want to use the image on a different system, you need to publish it to your CTO.ai registry.
- Publish your workflow, and enter the updated version.

- In your terminal, you will see your workflow tag, size, and your registry.
Run Your Automated Workflow
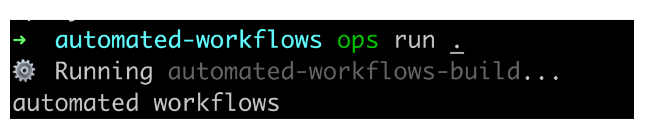
After building and publishing your workflow, you can create a new container from your workflow image and run it using the ops run . command.
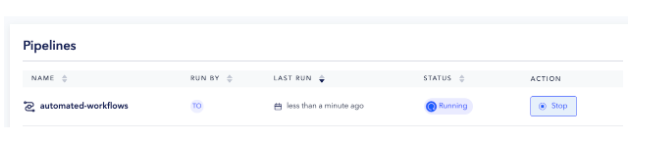
View Pipeline Workflow in CTO.ai Dashboard
Back in your CTO.ai dashboard, you can see the pipeline you built and published directly on your CLI. Here the name of our pipeline is automated-workflows you will see that your pipeline is running in your pipeline dashboard.
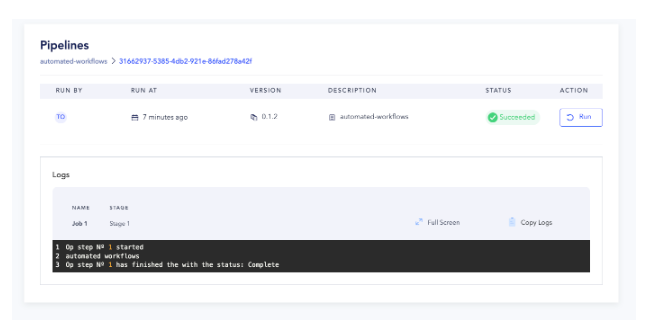
- Click on your pipeline, you will see your Pipeline ID, VERSION number, STATUS, and ACTION with the pipeline logs.
CTO.ai workflows are powerful and flexible. You can use them to design a CI/CD process that fits your team's specific needs. It allows development teams to focus on creating great software without worrying about the repetitive tasks associated with integrating and deploying code.
Automate DevOps with CTO.ai
As we've shown in this blog post, CTO.ai is a powerful tool for creating automated workflows that can streamline your development process, minimize repetitive tasks, and ultimately boost your productivity. Whether you're a solo developer or part of a large team, adopting such automation practices can revolutionize how you approach software development, saving valuable time and reducing the chances of human error.
If you're ready to take the next step and leverage the potential of CTO.ai Ops CLI, click here to request a demo. Remember, the initial time investment in learning and setting up these automated workflows will pay off in the long run through increased efficiency and a smoother development process.
Comments