DigitalOcean Stack
Our Workflows.sh do-k8s-cdktf repository contains a complete, functional, git-enabled PaaS workflow with integrated ChatOps features. Designed for deployment to DigitalOcean infrastructure, this workflow supports Kubernetes on DigitalOcean, using CDKTF and Terraform Cloud to provision your infrastructure.
With this stack, you can deploy your application to a DigitalOcean Kubernetes cluster, which uses Virtual Private Cloud (VPC), DigitalOcean Spaces (object storage with a built-in CDN), DigitalOcean Container Registry, and a Load Balancer with automatically-provisioned Let’s Encrypt TLS certificates.
Get Started
Prerequisites
Before you begin, you will need to have accounts with the following services:
Add environment variables to Secrets Store
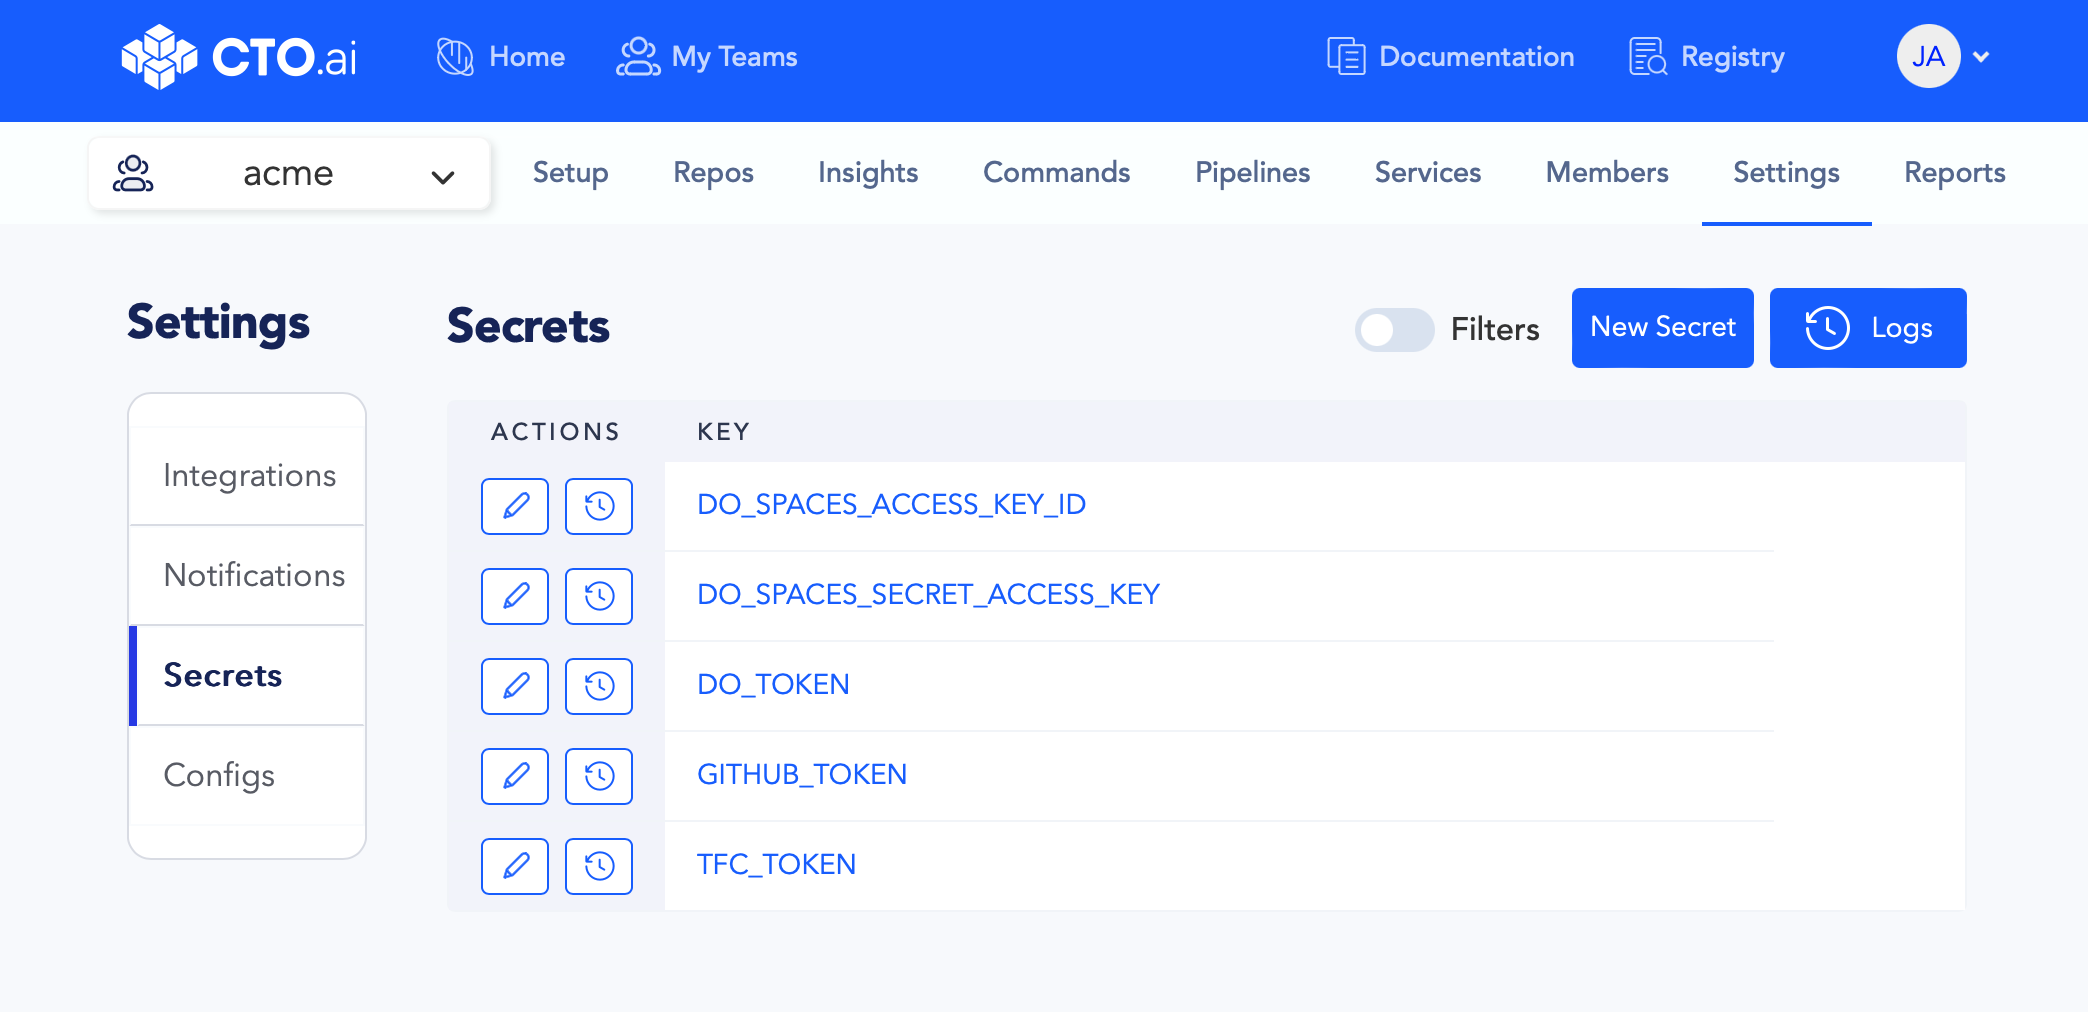
Create new environment variables via your Secrets Store on the CTO.ai Dashboard, one for each of the following keys:
DO_TOKENDO_SPACES_ACCESS_KEY_IDDO_SPACES_SECRET_ACCESS_KEYTFC_TOKENGITHUB_TOKEN
Detailed instructions for adding environment variables to your Secrets Store can be found on our Using Secrets and Configs via Dashboard page. Instructions for generating the required access tokens can be found here:
Generate GitHub access token
To create your GITHUB_TOKEN, on GitHub, navigate to Settings → Developer Settings → Personal access tokens → Tokens (classic) and generate a new token:
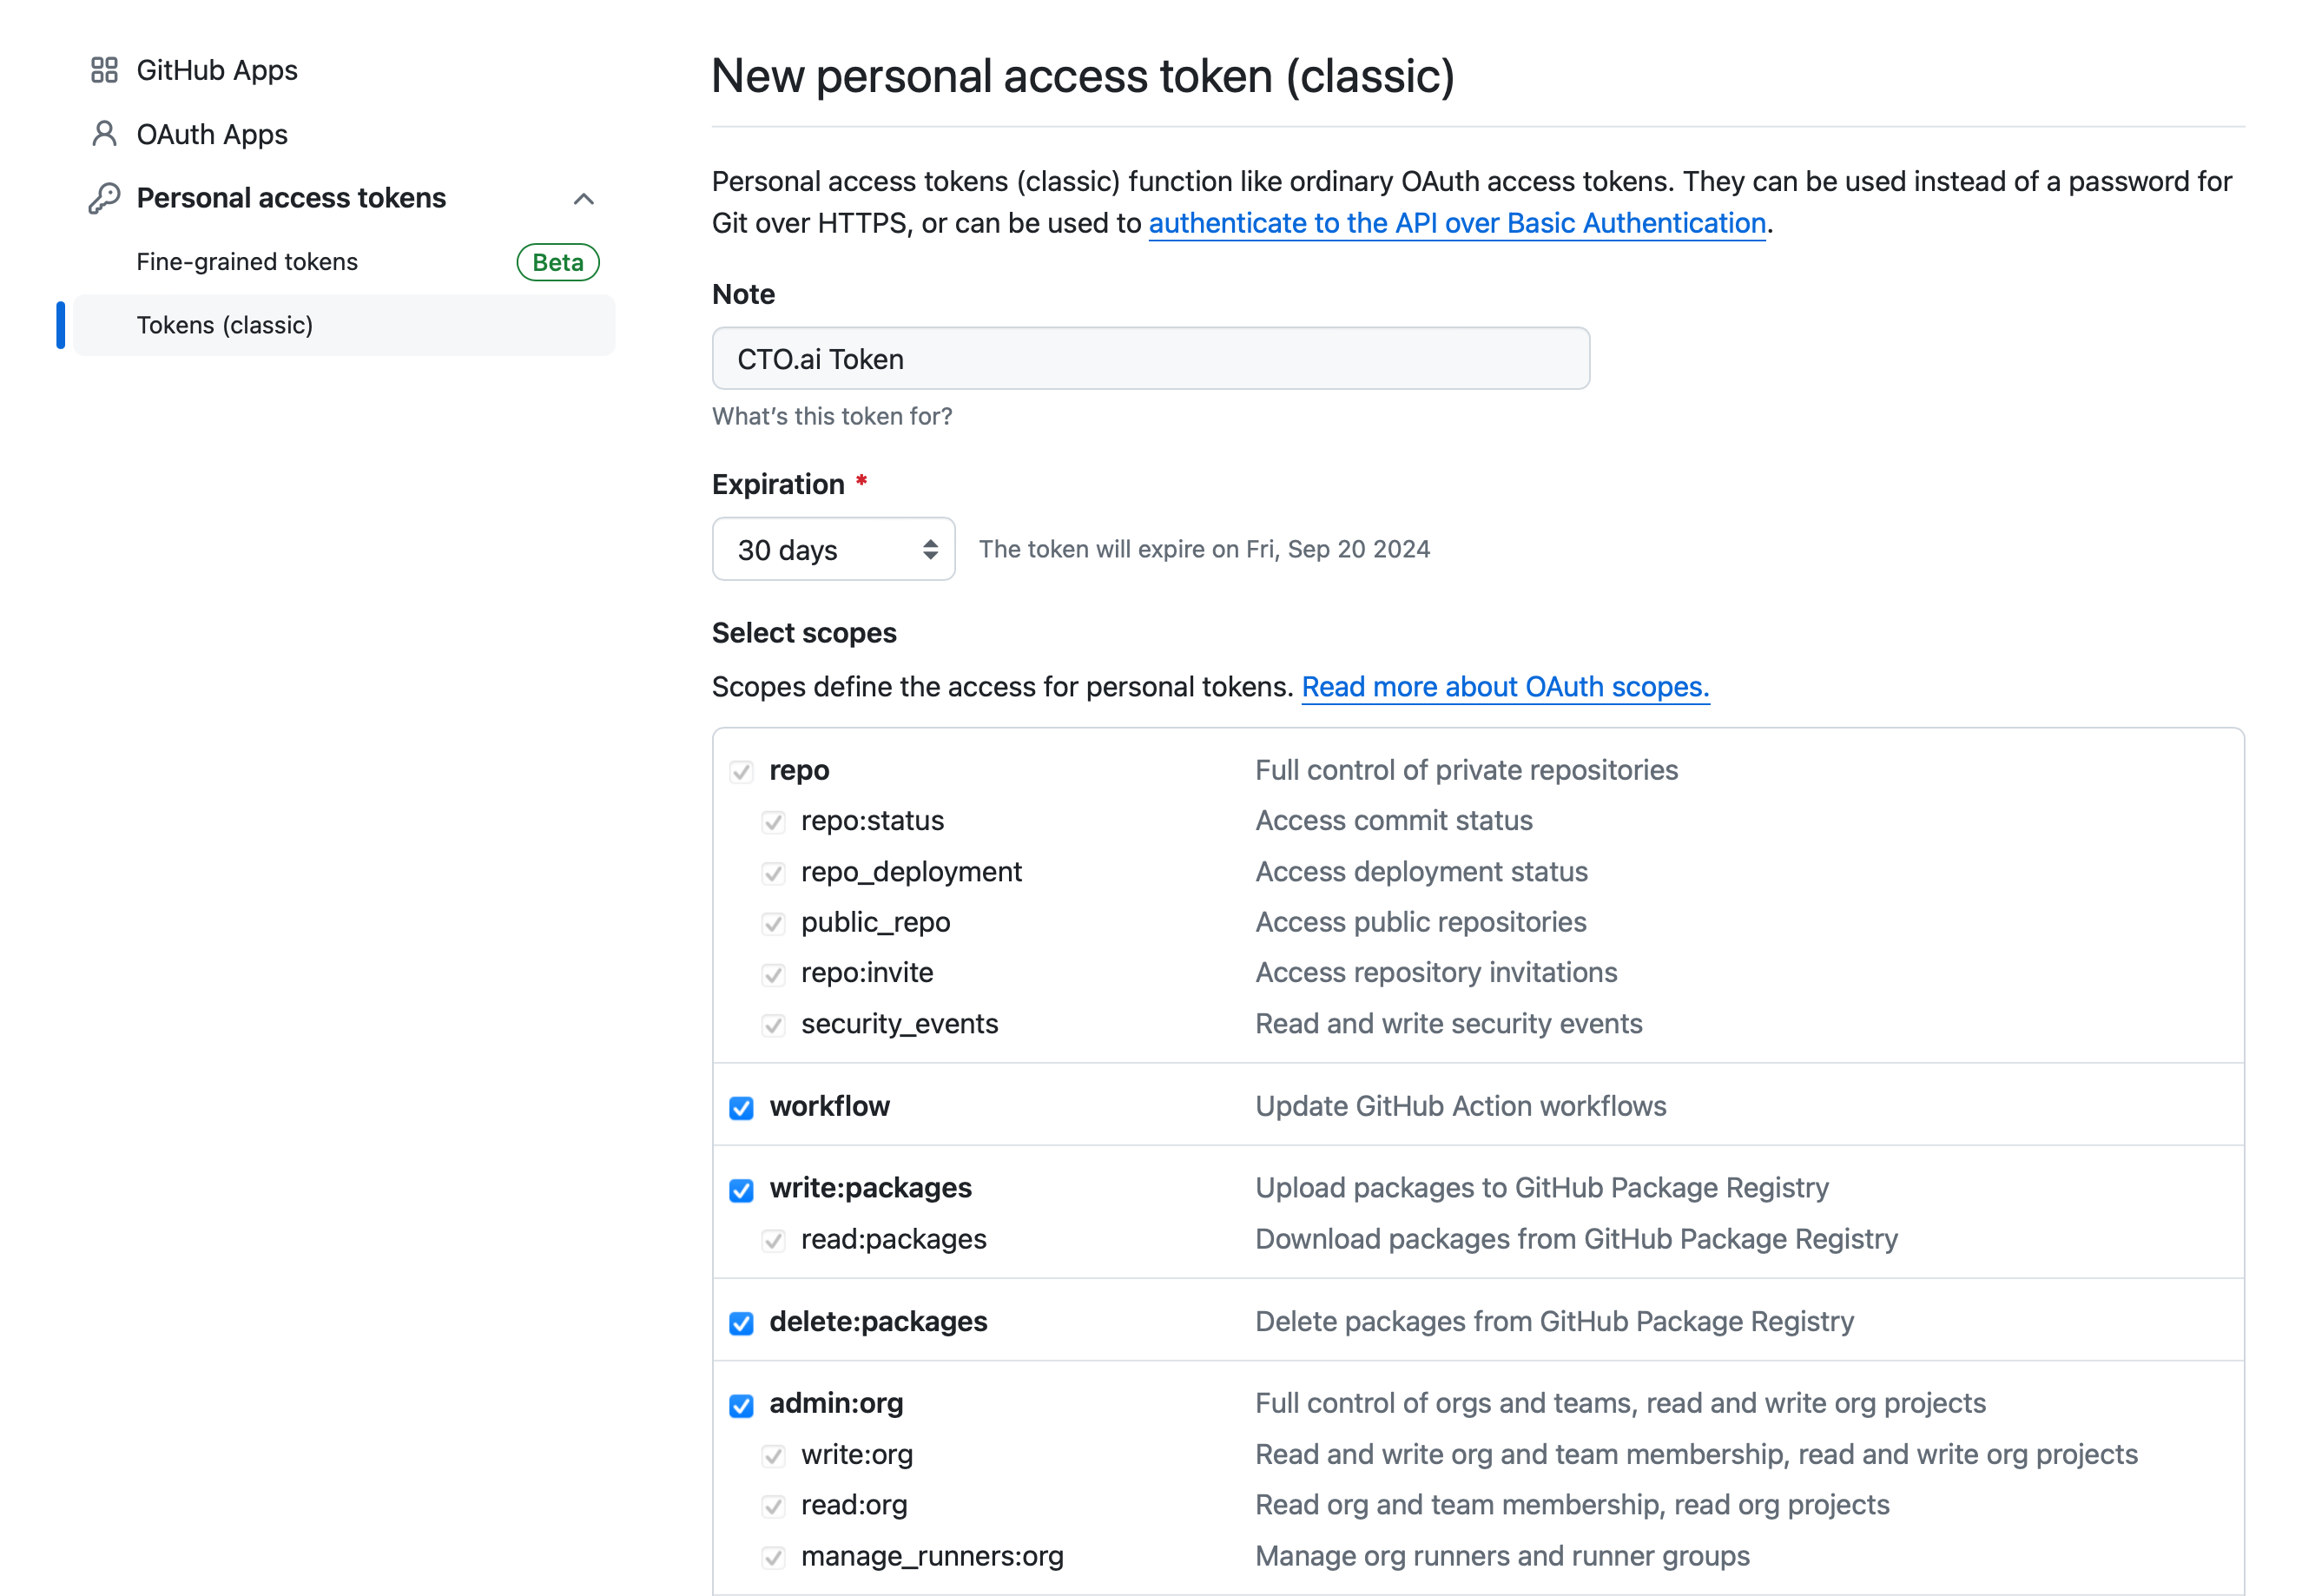
Generate DigitalOcean access token
From the DigitalOcean dashboard, generate a new personal access token with full access to the resources in your account:
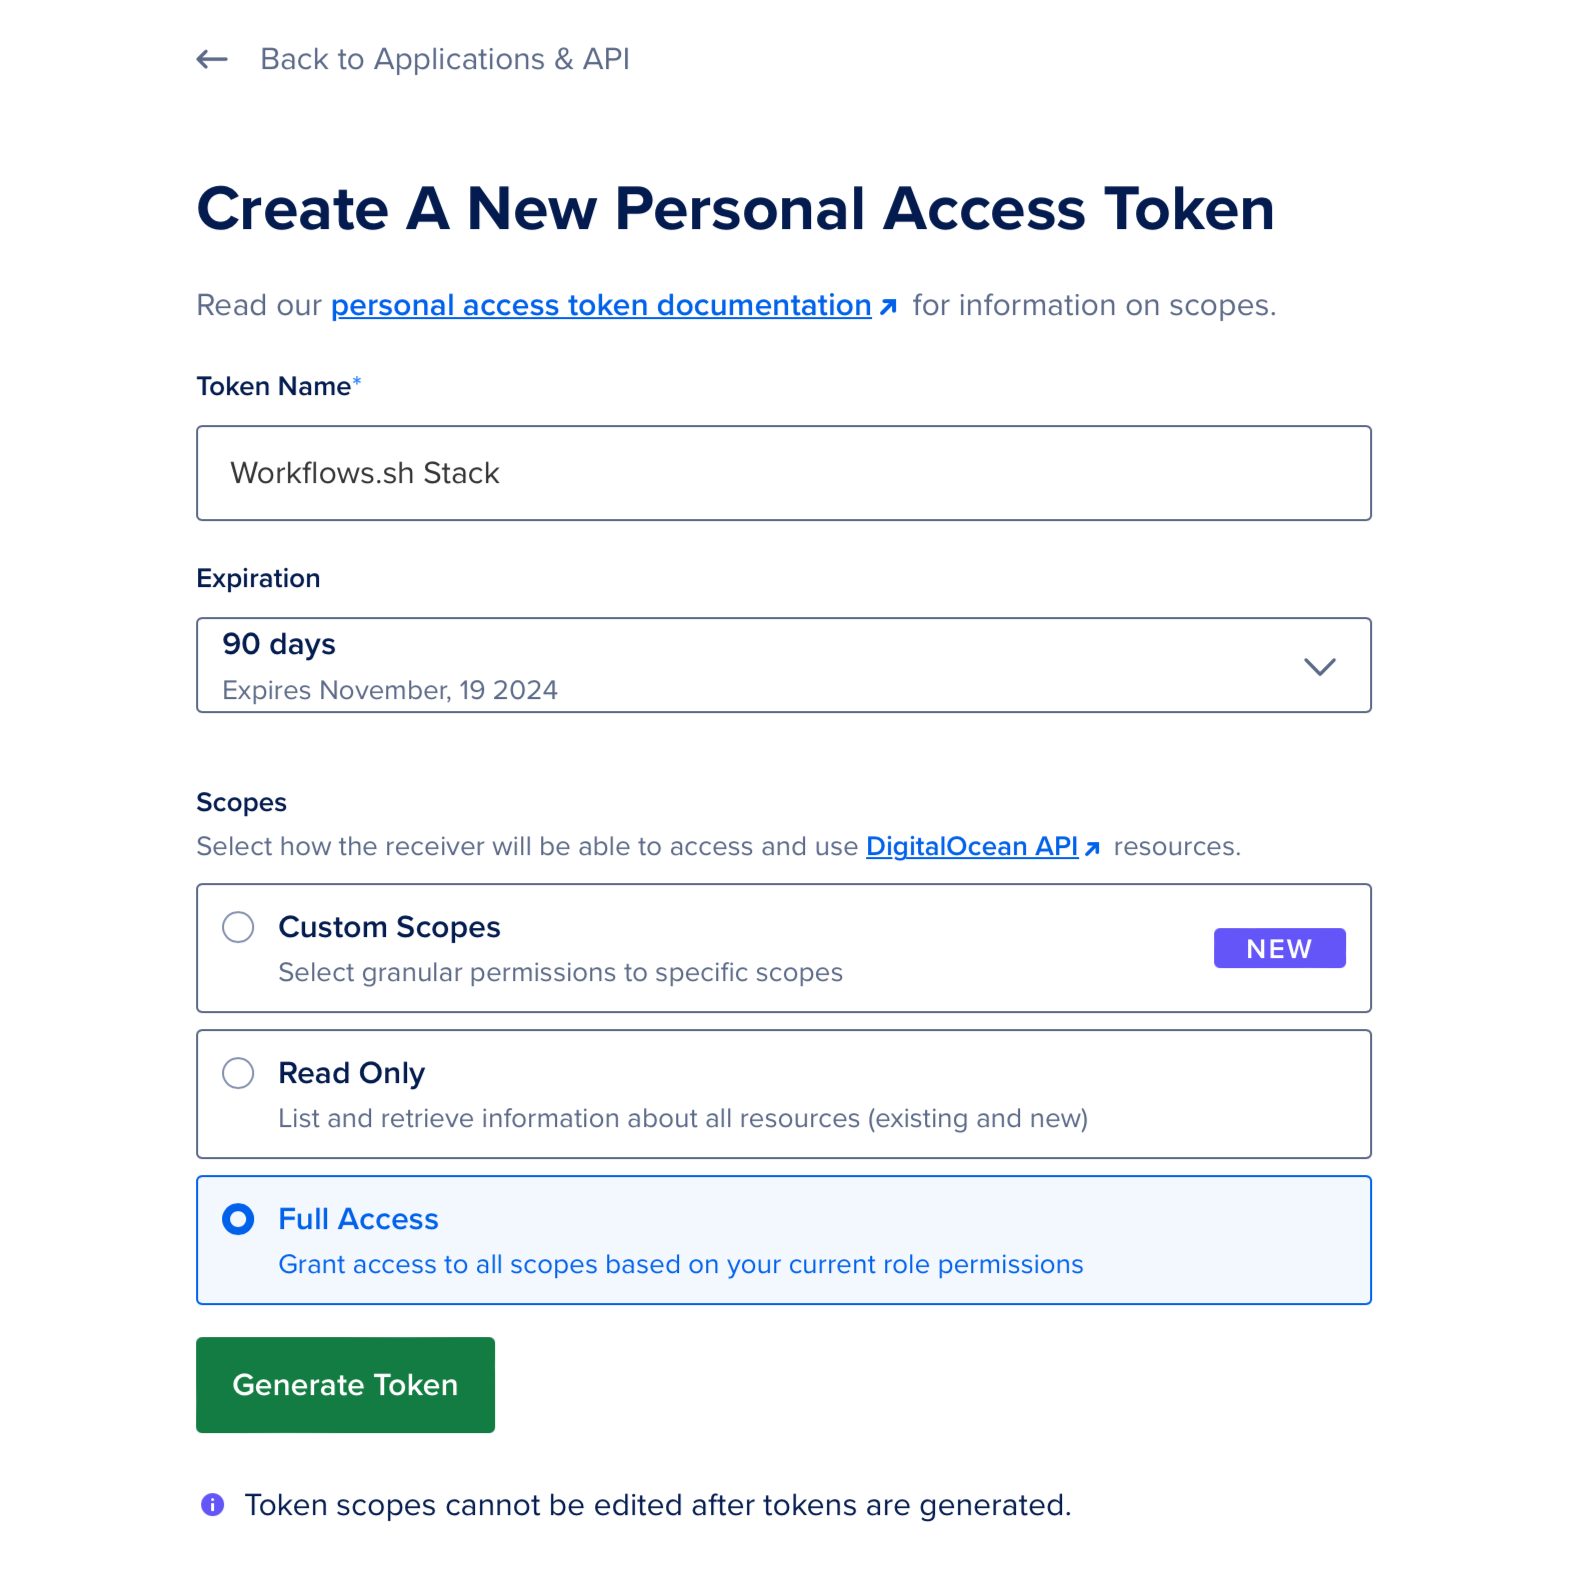
Add the generated token to your Secrets Store as DO_TOKEN. Then, generate a new Spaces access key pair by navigating to the Spaces Keys tab and clicking Generate New Key.
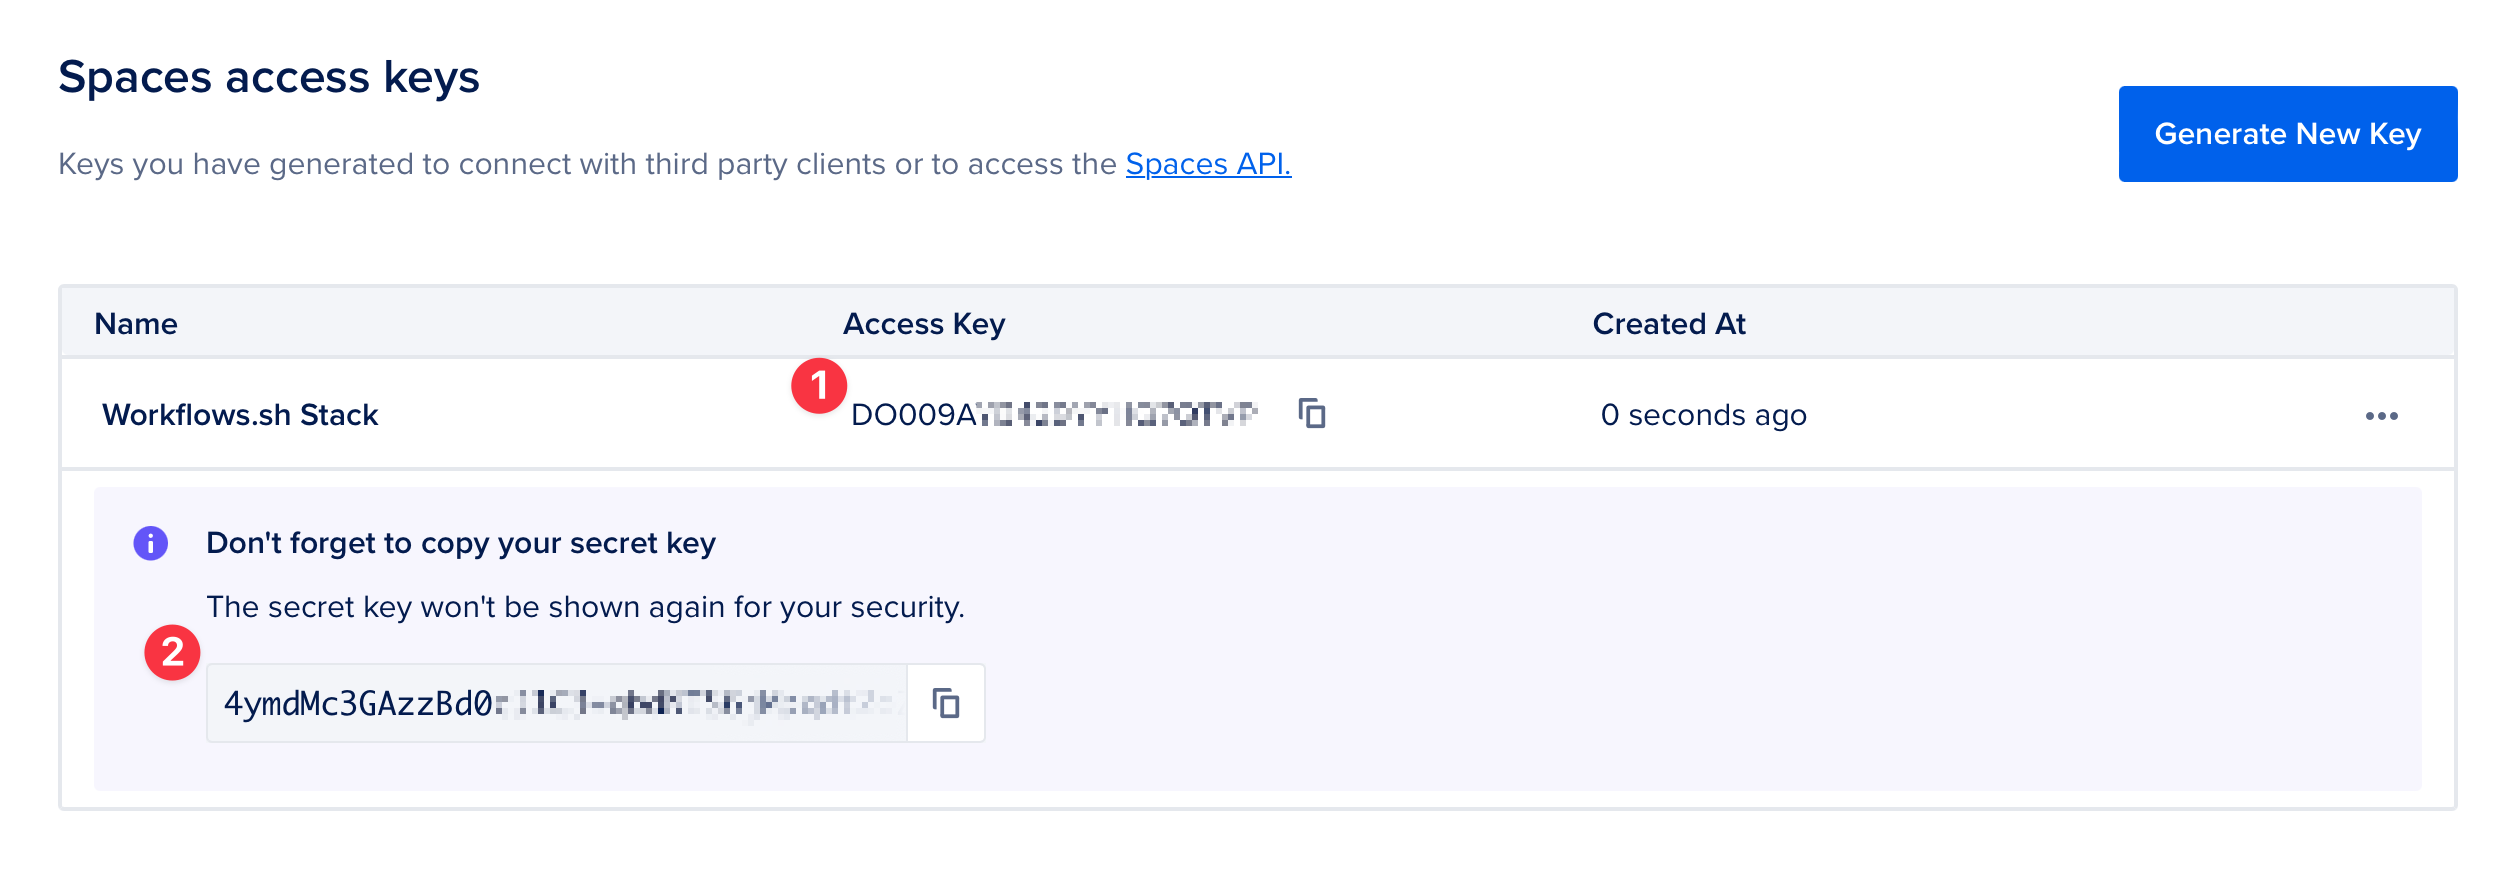
Add the generated Spaces key pair to your Secrets Store with:
- The Access Key as
DO_SPACES_ACCESS_KEY_ID. - The secret key as
DO_SPACES_SECRET_ACCESS_KEY.
Generate HCP Terraform access token
To create your TFC_TOKEN, from the HCP Terraform dashboard, generate a new API token:

Deploy the Stack
Build the setup workflow locally
Clone the GitHub repository for this workflow stack locally, then change in to the directory:
git clone https://github.com/workflows-sh/do-k8s-cdktf.git
cd do-k8s-cdktf
To make it easier to deploy this stack manually, we will just need to make a few minor adjustments to the ops.yml file contained in this repository:
Update TFC_ORG static variable
In the section of each Workflow where the static variables are defined, when the TFC_ORG variable is set, update the value to match the name of your HCP Terraform organization.
Add STACK_ORG static variable
In the static variable definitions for each Workflow, add a new variable named STACK_ORG and set its value to the slug you use for your organization on the CTO.ai platform, e.g.:
    # . . .
    env:
      static:
        # . . .
        - STACK_ORG=<YOUR_CTOAI_ORG_NAME>
        - TFC_ORG=<YOUR_TFC_ORG_NAME>
        # . . .
Then, use the ops build command to build the Workflow containers that we will use to deploy and manage this stack. Select the setup-do-k8s-cdktf workflow from the presented options, then press Enter to proceed:
Deploy your dev stack
Once your setup-do-k8s-cdktf container image has been built, you can use it to deploy this stack to your DigitalOcean infrastructure via your HCP Terraform workspace. Run the ops run command, select the setup-do-k8s-cdktf workflow to run, then follow the prompts to deploy a dev stack to your infrastructure:
Bootstrap the Sample App
To show you how to get started, we will deploy the sample application (built for use with this stack) to our new Kubernetes cluster. Clone the repo locally, then change in to the cloned directory:
git clone [email protected]:workflows-sh/sample-expressjs-do-k8s-cdktf.git
cd sample-expressjs-do-k8s-cdktf
If you choose to fork the repo to your GitHub organization instead, ensure that you update the ops.yml file with your GitHub organization name as the value for the GH_ORG static variable, then commit and push the changes to your forked repository.
Configure the sample app Pipeline
The application requires minimal configuration, but to make it easier to hit the ground running, we’ll also make a few tweaks to the ops.yml file that will allow the Pipeline to be manually triggered.
When a Pipeline is triggered by a GitHub event, our platform automatically sets environment variables in the Pipeline’s runtime environment to provide context about the event. This includes the SHA hash of the commit that triggered the Pipeline, which is stored in the $REF environment variable, as well as the name of the organization and repository that originated the event, stored in the $GH_ORG and $REPO variables, respectively.
Let’s make a few changes to the ops.yml file that will provide the necessary default context to allow the Pipeline to be manually triggered successfully:
Set static variables
In the ops.yml file, under the definition for the sample-expressjs-pipeline-do-k8s-cdktf Pipeline, set the value of the ORG static variable to the name of your organization on the CTO.ai platform:
GH_ORG static variable in the ops.yml file to match the name of your GitHub org!Modify Pipeline to allow manual triggers
By default, manually starting the Pipeline will fail, as the Pipeline includes a step that attempts to run git checkout "${REF}". This causes failure when the Pipeline is manually run, because there is no ${REF} variable set in the Pipeline’s runtime environment.
However, we can make a change to the Pipeline to allow manual triggers to successfully build our sample app, just by adding a line of Bash. If (and only if) the $REF variable is unset when the Pipeline is run, the following line will set the value of $REF to the SHA of the head of the default branch that was already checked out in an earlier step:
Explanation of this command
- The colon (
:) is a no-op command built into Bash which only performs argument expansion on the code that follows it. - The
${VAR:=value}syntax is a parameter expansion construct that setsVARtovalueonly ifVARis unset or null.
Thus, when this line is executed, the value of $REF will be set to the checked out commit SHA from that point forward, but only if $REF is empty or unset at that point. If $REF already has a value set, the value will remain unchanged.
In the Pipeline’s Job definition, after the repo is cloned, but before a specific $REF is checked out, add the above line to the list of steps, wrapping it in quotes as YAML requires:
ops.yml file after Pipeline modification
Below is the full ops.yml file (excluding services section which we are not using in this example) with the modifications to make to the sample-expressjs-pipeline-do-k8s-cdktf Pipeline:
version: "1"
pipelines:
  - name: sample-expressjs-pipeline-do-k8s-cdktf:0.2.5
    description: Build and Publish an image in a DigitalOcean Container Registry
    env:
      static:
        - DEBIAN_FRONTEND=noninteractive
        - STACK_TYPE=do-k8s-cdktf
        - ORG=<YOUR_CTOAI_ORG_NAME> # This should be your CTO.ai org name
        - GH_ORG=workflows-sh # If you forked the repo, update this to your org name
        - REPO=sample-expressjs-do-k8s-cdktf
        - BIN_LOCATION=/tmp/tools
      secrets:
        - GITHUB_TOKEN
        - DO_TOKEN
    events:
      - "github:workflows-sh/sample-expressjs-do-k8s-cdktf:pull_request.opened"
      - "github:workflows-sh/sample-expressjs-do-k8s-cdktf:pull_request.synchronize"
      - "github:workflows-sh/sample-expressjs-do-k8s-cdktf:pull_request.merged"
    jobs:
      - name: sample-expressjs-build-do-k8s-cdktf
        description: Build step for sample-expressjs-do-k8s-cdktf
        packages:
          - git
          - unzip
          - wget
          - tar
        steps:
          - mkdir -p $BIN_LOCATION
          - export PATH=$PATH:$BIN_LOCATION
          - ls -asl $BIN_LOCATION
          - DOCTL_DL_URL='https://github.com/digitalocean/doctl/releases/download/v1.79.0/doctl-1.79.0-linux-amd64.tar.gz' # Update to latest doctl binary here by providing URL
          - wget $DOCTL_DL_URL -O doctl.tar.gz
          - tar xf doctl.tar.gz -C $BIN_LOCATION
          - doctl version
          - git version
          - git clone https://oauth2:[email protected]/$GH_ORG/$REPO
          - cd $REPO && ls -asl
          - ": ${REF:=$(git rev-parse HEAD)}" # <-- This line is added to your ops.yml
          - git fetch -a && git checkout "${REF}"
          - doctl auth init -t $DO_TOKEN
          - doctl registry login
          - CLEAN_REF=$(echo "${REF}" | sed 's/[^a-zA-Z0-9]/-/g' )
          - docker build -f Dockerfile -t one-img-to-rule-them-all:latest .
          - docker tag one-img-to-rule-them-all:latest registry.digitalocean.com/$ORG/$REPO:$CLEAN_REF
          - docker push registry.digitalocean.com/$ORG/$REPO:$CLEAN_REF
# . . .
Build and publish the sample app Pipeline
After you have made the necessary adjustments to the base configuration of the sample application, you can use the ops build . command to produce the container image for the application. When prompted to select which Workflows to build, use the spacebar to select the sample-expressjs-pipeline-do-k8s-cdktf Pipeline, then press Enter to proceed:
Your sample application container image will be built and tagged with the name of your organization on the CTO.ai platform and the name of the Pipeline Job that built it.
Next, publish this image to the CTO.ai platform registry using the following steps:
Run ops publish command
Run the ops publish . command in the root of the sample application repository to begin the publishing process.
Select the Pipeline
In the list of available Workflows, use the arrow keys and spacebar to select the sample-expressjs-pipeline-do-k8s-cdktf Pipeline, then press Enter to proceed.
Set a version for the image
When prompted, provide an incremented semantic version number for the image. The image we previously built will be rebuilt from the cache and tagged with this new version, then pushed to the CTO.ai platform registry.
Add a changelog
After the image has been pushed to the registry, you will be prompted to add a changelog for the new version. Add a brief description of what has changed in this version.
The full process is demonstrated below:
Trigger Pipeline to build sample app
Manually trigger the pipeline that builds our sample app container image and pushes it to the container registry for our Kubernetes cluster, using the ops start command:
ops start sample-expressjs-pipeline-do-k8s-cdktfIf the Pipeline starts successfully, you should be provided with a URL to view the Pipeline’s progress via the CTO.ai dashboard, e.g.:
How does this Pipeline work?
Broadly speaking, the Pipeline will:
- Download the
doctlbinary to the running container and add it to the$PATH. - Clone the sample application from the
${GH_ORG}/${REPO}repository, which is this same sample application by default. The$GITHUB_TOKENsecret used to authenticate was added to the team’s Secrets Store on the CTO.ai platform. - Checkout the commit SHA (specified by
${REF}) that triggered the Pipeline to run, or the default branch if the Pipeline was manually triggered, as it was in this case. - Authenticate with the DigitalOcean API via the
doctlbinary, using the$DO_TOKENsecret that was added to the team’s Secrets Store on the CTO.ai platform. - The Dockerfile from the repository is used to build a container image using the
dockerCLI. This image is tagged with the name of your org and the repository, as well as the commit SHA as the version tag. - The container image is pushed to your DigitalOcean Container Registry for use by your Kubernetes cluster.
pipelines:
  - name: sample-expressjs-pipeline-do-k8s-cdktf:0.2.7
    description: Build and Publish an image in a DigitalOcean Container Registry
    # . . .
    jobs:
      - name: sample-expressjs-build-do-k8s-cdktf
        description: Build step for sample-expressjs-do-k8s-cdktf
        # . . .
        steps:
          # Download the doctl binary and add it to the $PATH
          - mkdir -p $BIN_LOCATION
          - export PATH=$PATH:$BIN_LOCATION
          - ls -asl $BIN_LOCATION
          - DOCTL_DL_URL='https://github.com/digitalocean/doctl/releases/download/v1.79.0/doctl-1.79.0-linux-amd64.tar.gz' # Update to latest doctl binary here by providing URL
          - wget $DOCTL_DL_URL -O doctl.tar.gz
          - tar xf doctl.tar.gz -C $BIN_LOCATION
          - doctl version

          # Clone the sample application repository
          - git version
          - git clone https://oauth2:[email protected]/$GH_ORG/$REPO
          - cd $REPO && ls -asl

          # Set the $REF variable to the checked out commit SHA
          - ": ${REF:=$(git rev-parse HEAD)}"

          # Checkout the commit SHA that the Pipeline is being run with
          - git fetch -a && git checkout "${REF}"

          # Authenticate with the DigitalOcean API
          - doctl auth init -t $DO_TOKEN
          - doctl registry login
          - CLEAN_REF=$(echo "${REF}" | sed 's/[^a-zA-Z0-9]/-/g' )

          # Build the container image and tag it with the commit SHA
          - docker build -f Dockerfile -t one-img-to-rule-them-all:latest .
          - docker tag one-img-to-rule-them-all:latest registry.digitalocean.com/$ORG/$REPO:$CLEAN_REF

          # Push the container image to the DigitalOcean Container Registry
          - docker push registry.digitalocean.com/$ORG/$REPO:$CLEAN_REF
Deploy the Sample App
After bootstrapping our sample application container image and pushing it to our DigitalOcean Container Registry, we are now ready to use the deploy-do-k8s-cdktf Command workflow to deploy the sample app to our Kubernetes cluster.
Build the deploy Command
If you haven’t built the deploy-do-k8s-cdktf Command workflow yet, you can do so by running the ops build . command in the root of your local do-k8s-cdktf repository with the appropriate workflow name specified:
ops build . --ops deploy-do-k8s-cdktfDeploy sample app to the cluster
To deploy the sample application to your Kubernetes cluster, follow the steps below:
Run ops run command
Run the ops run . command in the root of the do-k8s-cdktf repository to begin the interactive deployment process.
Select the deploy-do-k8s-cdktf Command
When prompted, use the arrow keys or search box to select the deploy-do-k8s-cdktf Command workflow from the list of available workflows, then press Enter to proceed.
Provide runtime values for deployment
When you run the deploy-do-k8s-cdktf Command workflow, you will be prompted to provide the following values:
- Which type of application?
- Select
app. - What is the name of the environment?
- Select
dev. - What is the name of the application repo?
- Enter the name of the sample app repository (
sample-expressjs-do-k8s-cdktf), which should be the default value presented to you.
Select the image to deploy
After you confirm that you want to deploy the app container sample-expressjs-do-k8s-cdktf to the dev environment (which we configured earlier in this tutorial), the Command will pull the available container images from your DigitalOcean Container Registry for the specified repository.
Select “No” (the default value) when asked if you want to deploy a custom image, then select the image that was autofilled into the response for you—this is the image we built and published earlier.
After you have confirmed all of these details, the deploy-do-k8s-cdktf Command workflow will deploy the specified container image to your dev environment that we previously set up in the setup-do-k8s-cdktf workflow. A walkthrough of the steps in this section can be found below:
Access the Cluster and App
After your DigitalOcean Kubernetes cluster for our dev environment has been deployed and the sample application has been deployed to that environment, you can access the cluster using Lens.
Add cluster credentials to kubectl
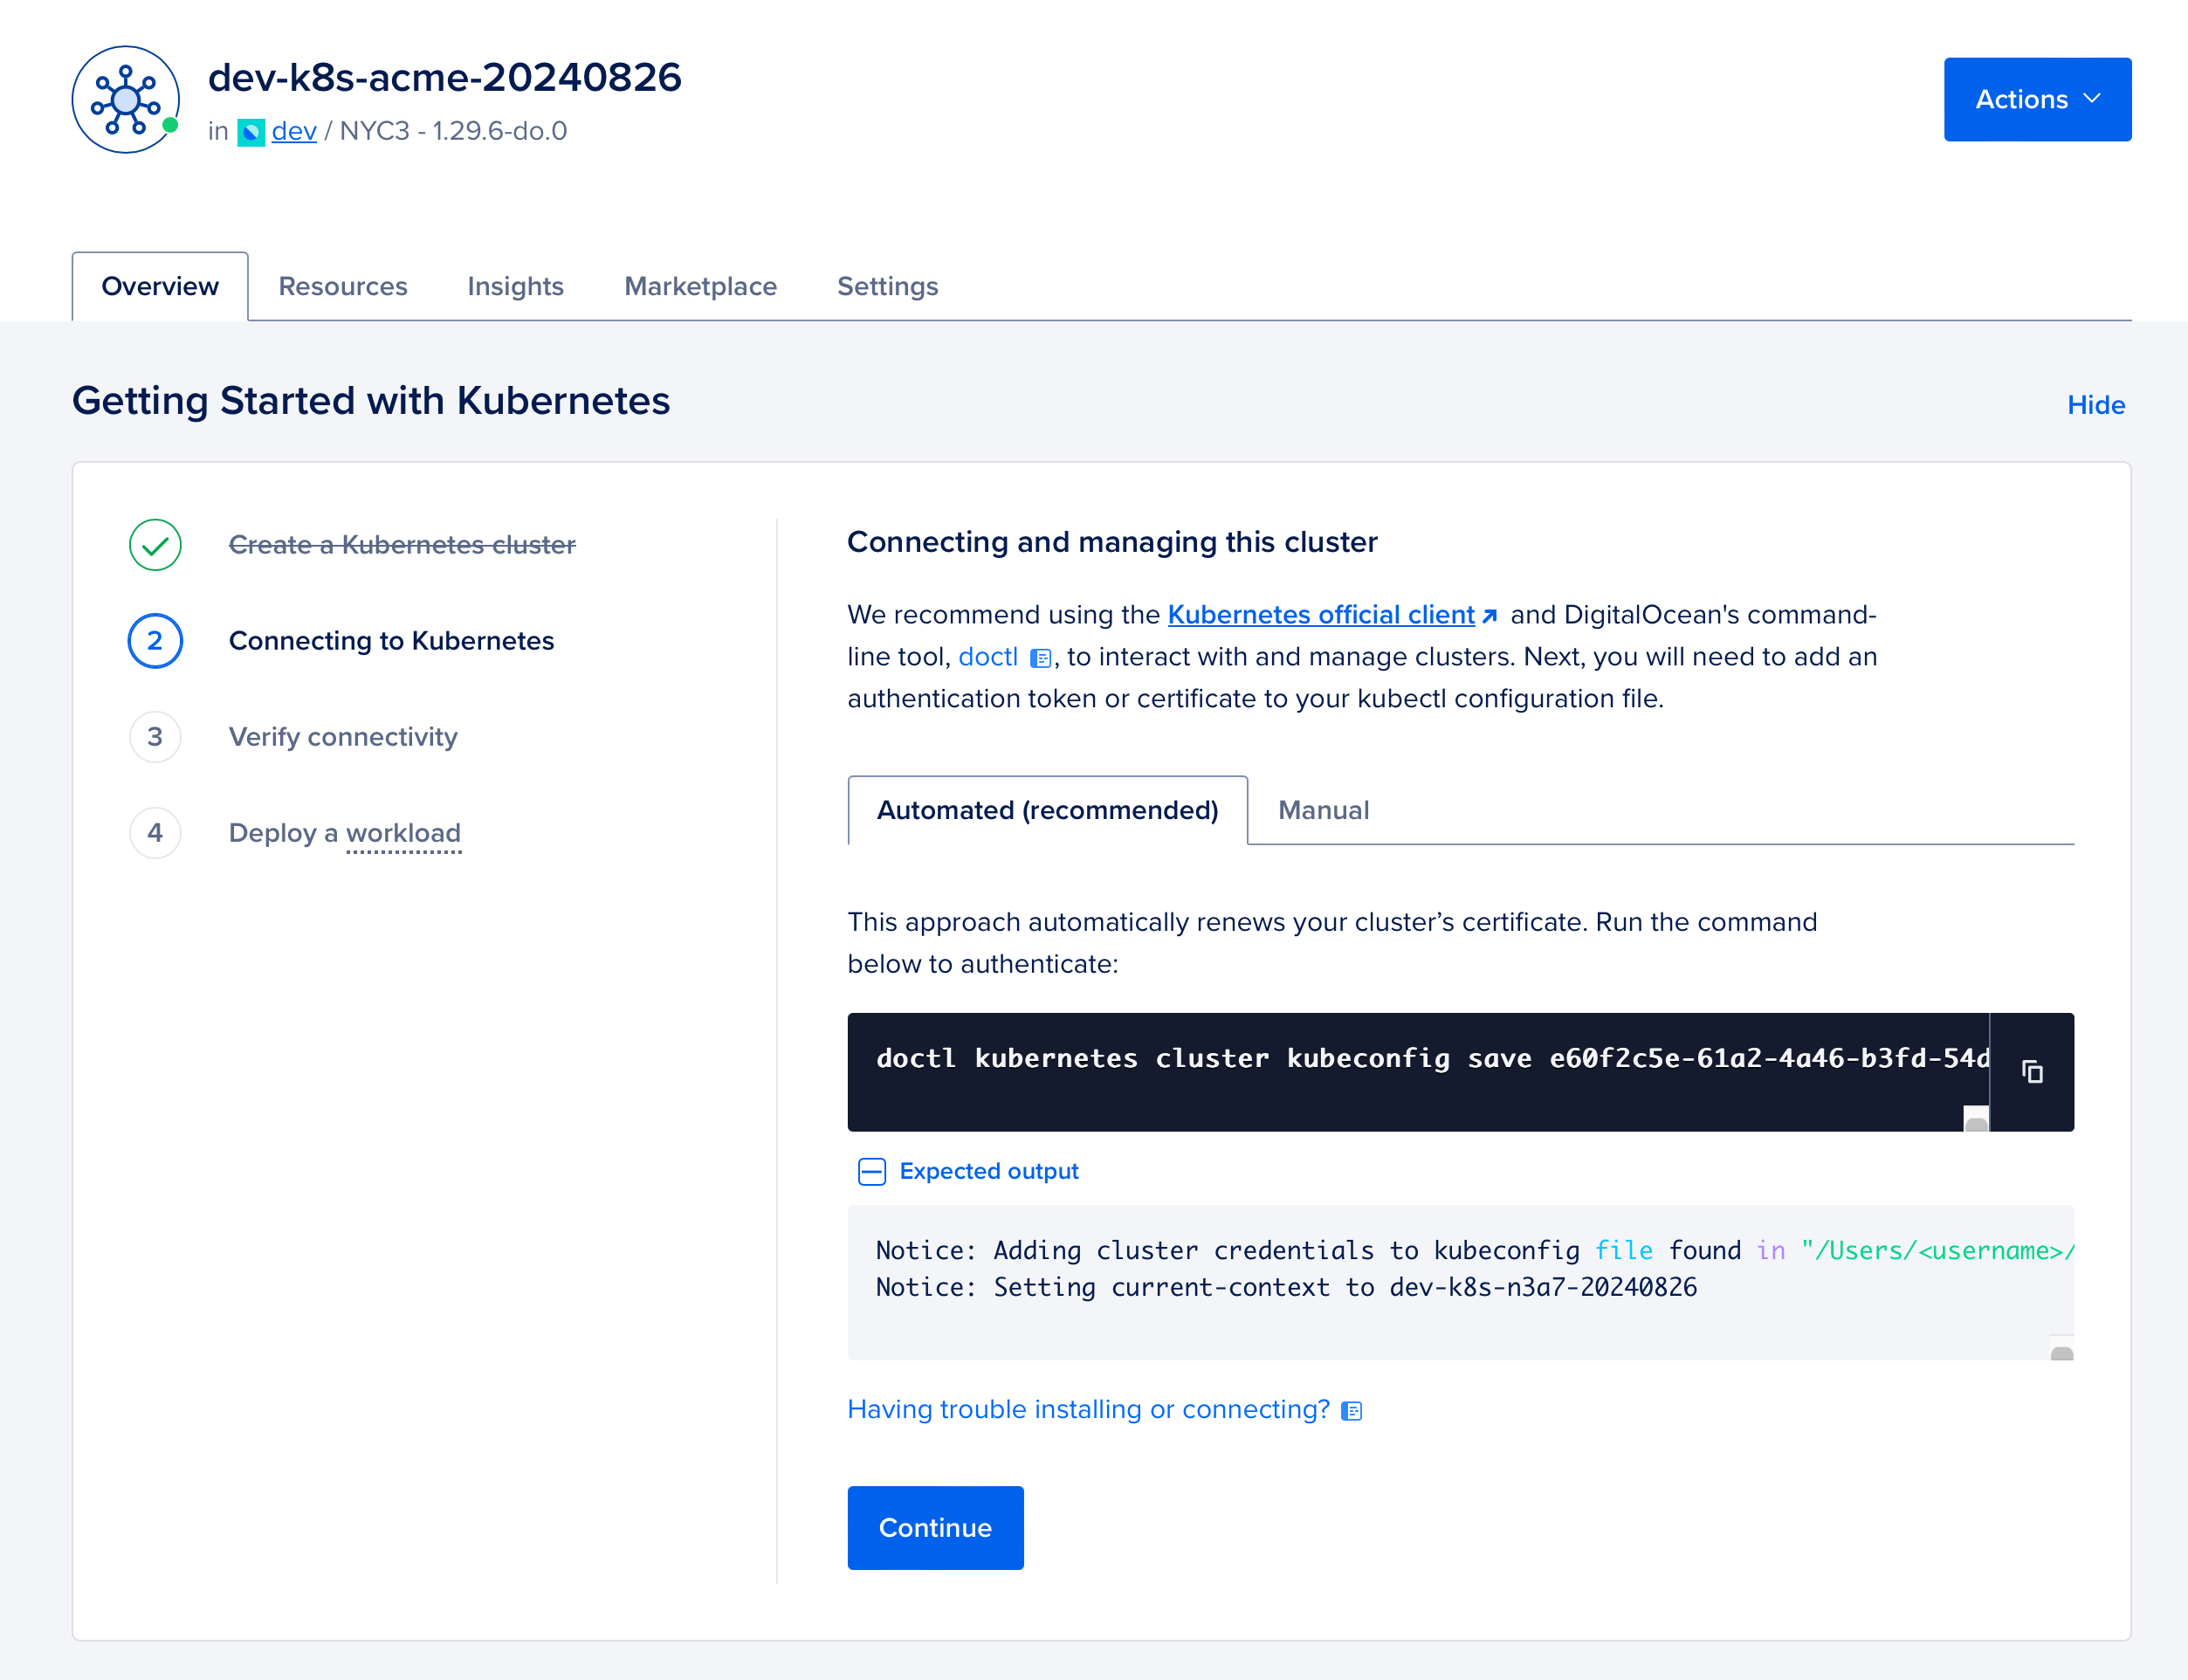
Before you can access your Kubernetes cluster with Lens, you will need to add the credentials for your deployed DigitalOcean Kubernetes cluster to your local kubectl configuration. You can do this by running the following doctl command in your terminal, replacing <CLUSTER> with the cluster name or ID that was output by the deploy-do-k8s-cdktf Command workflow:
doctl kubernetes cluster kubeconfig save <CLUSTER>If you added your org name to the ops.yml file for the stack Workflows as a static variable named STACK_ORG and left the STACK_ENTROPY variable as its default, your cluster name will be dev-k8s-<STACK_ORG>-20220921, as the cluster name is formatted according to the following convention:
<ENVIRONMENT>-k8s-<STACK_ORG>-<STACK_ENTROPY>where <ENVIRONMENT> is the environment name you provided when setting up the stack. Alternatively, you can use the doctl command to list the clusters accessible to your account:
> doctl kubernetes cluster list
ID                                      Name                     Region    Version        Auto Upgrade    Status     Node Pools
406294e0-8a53-4c79-8f97-7d2d92de066b    dev-k8s-acme-20220921    nyc3      1.29.8-do.0    false           running    dev-do-k8s-cdktf-k8s-node-acme-20220921
Pass the cluster ID or name to the doctl kubernetes cluster kubeconfig save command to add the cluster to your local kubectl configuration.
Of course, you can also access the same information through the DigitalOcean dashboard:
Access cluster with lens
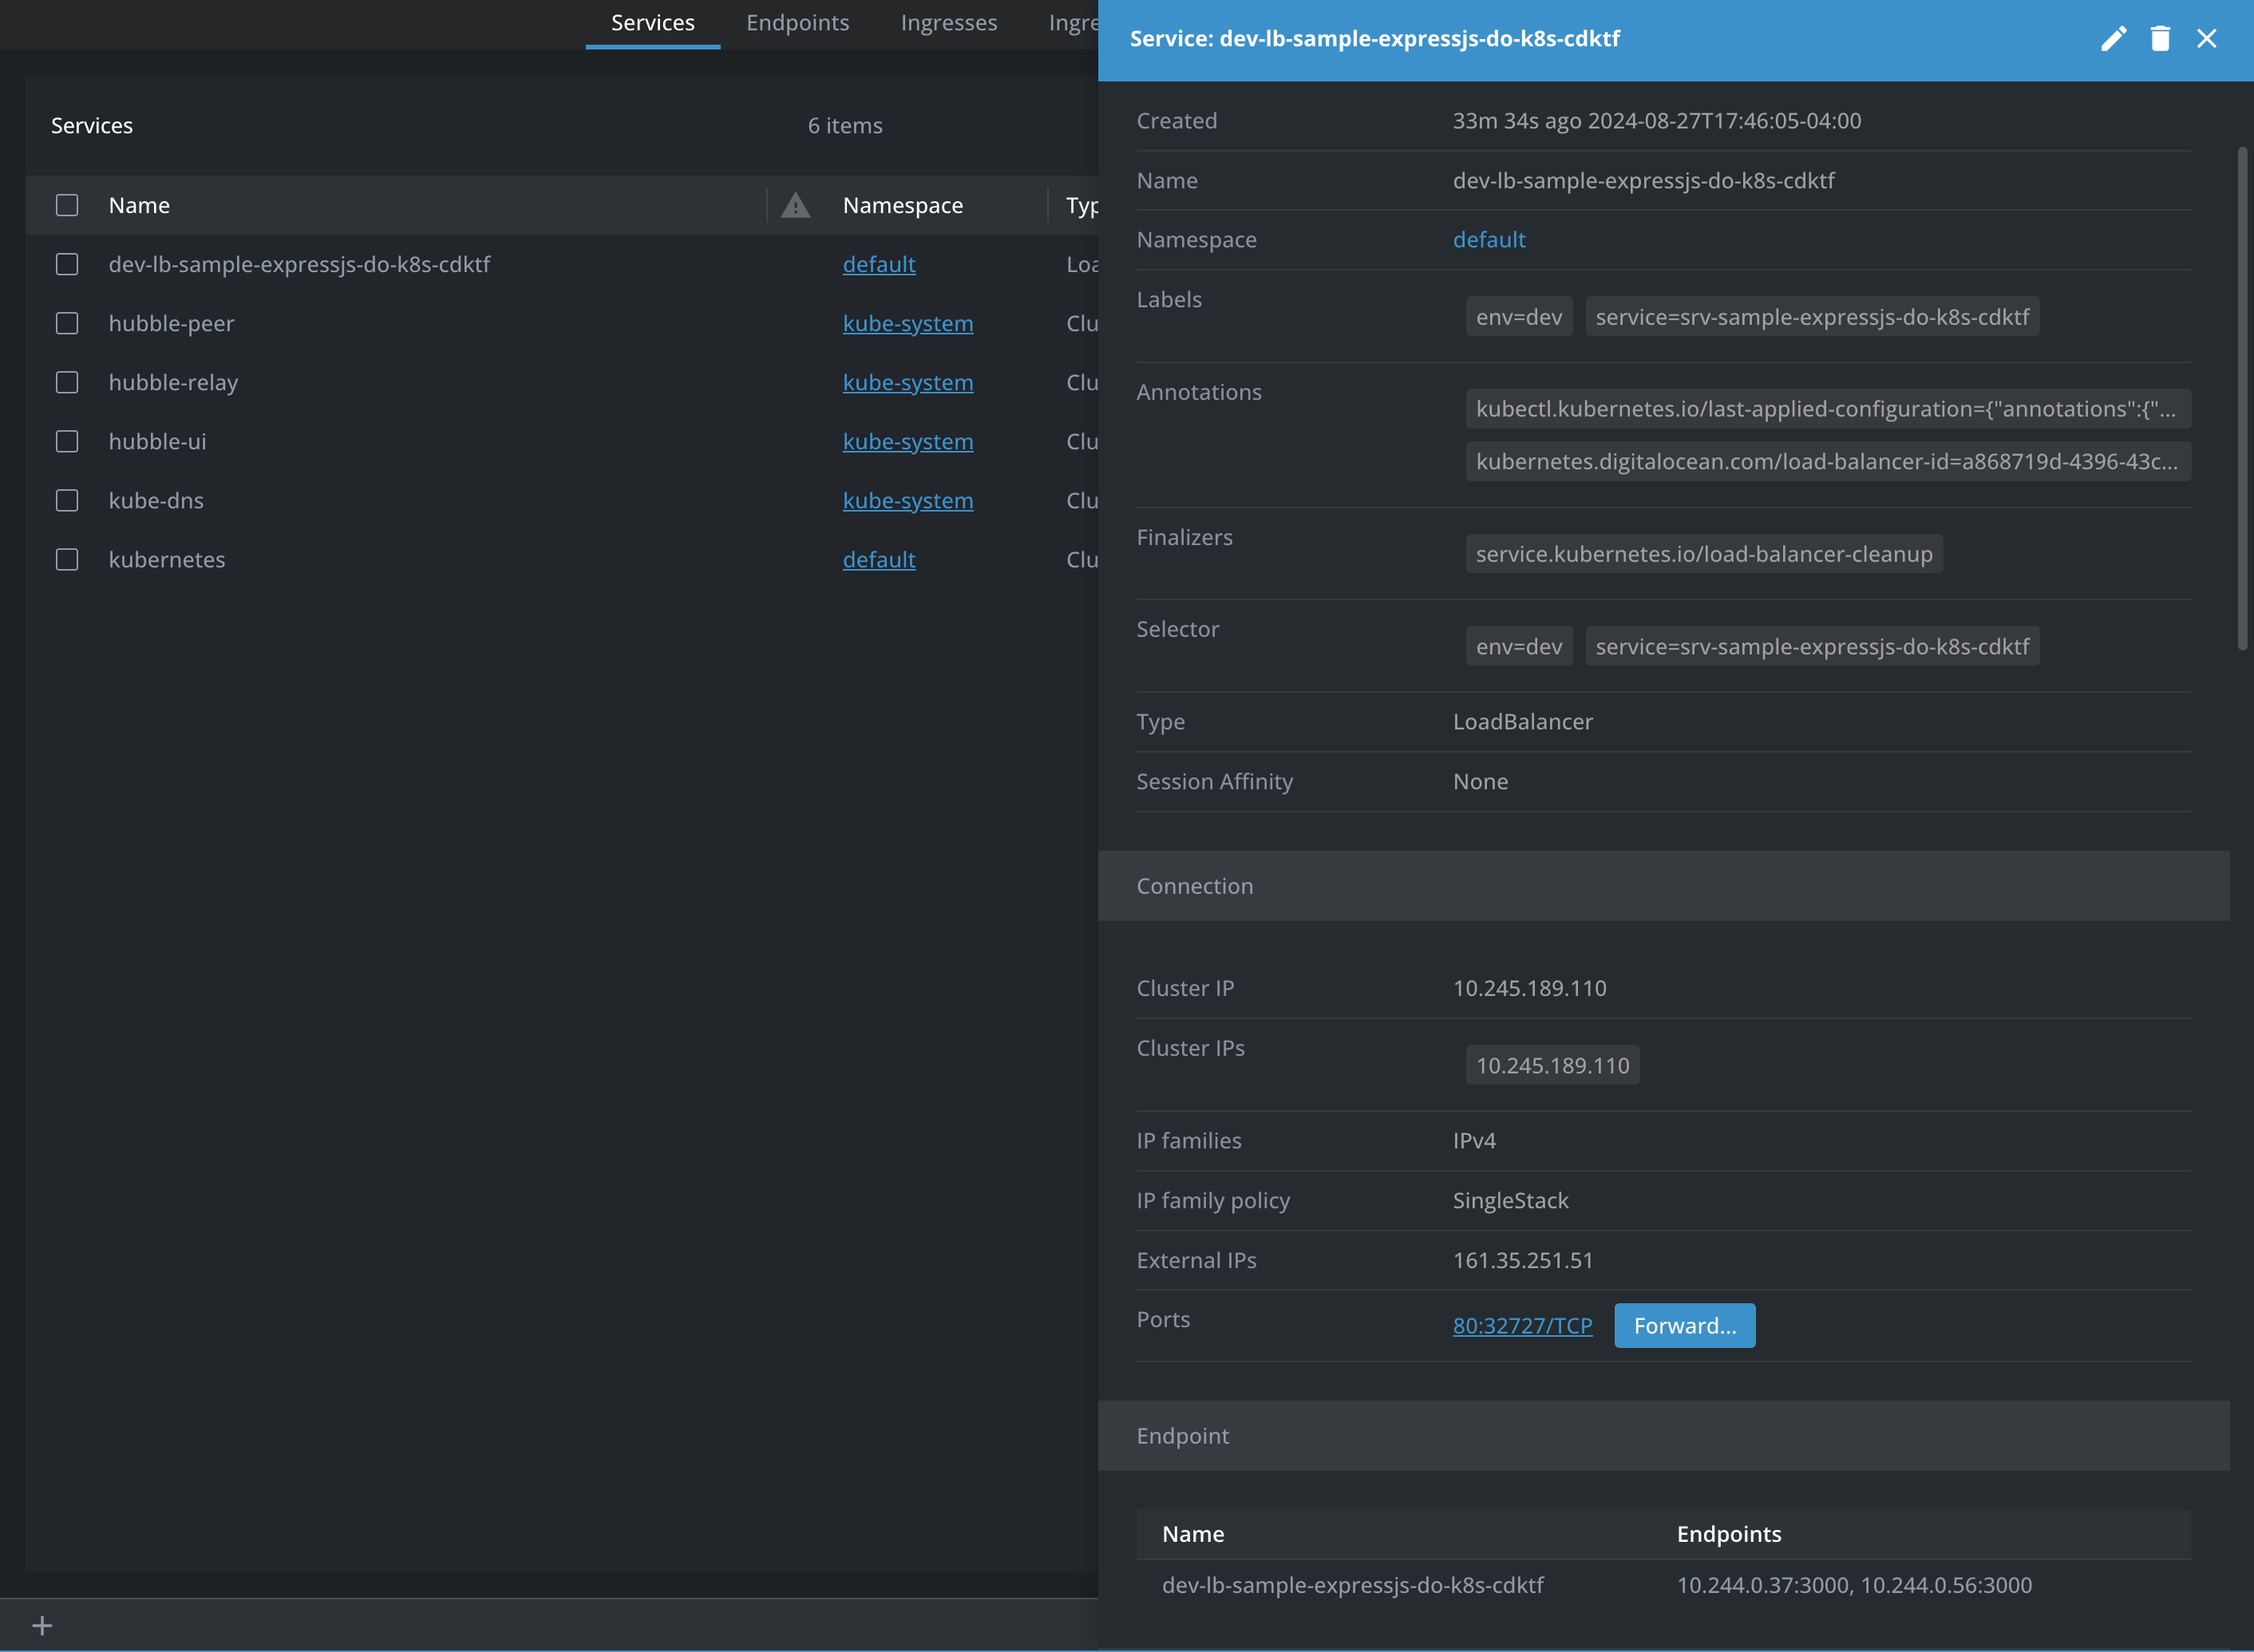
Using Lens, you can access the Kubernetes cluster that was deployed to your DigitalOcean infrastructure. Connect to your cluster, then navigate to the Services page under the Network section. Click on the deployed Load Balancer service to view its metadata.
In the Load Balancer service details, click on Forward… in the Connection section to forward the service port to your local machine. This will allow you to access the sample application that has been deployed to your Kubernetes cluster:
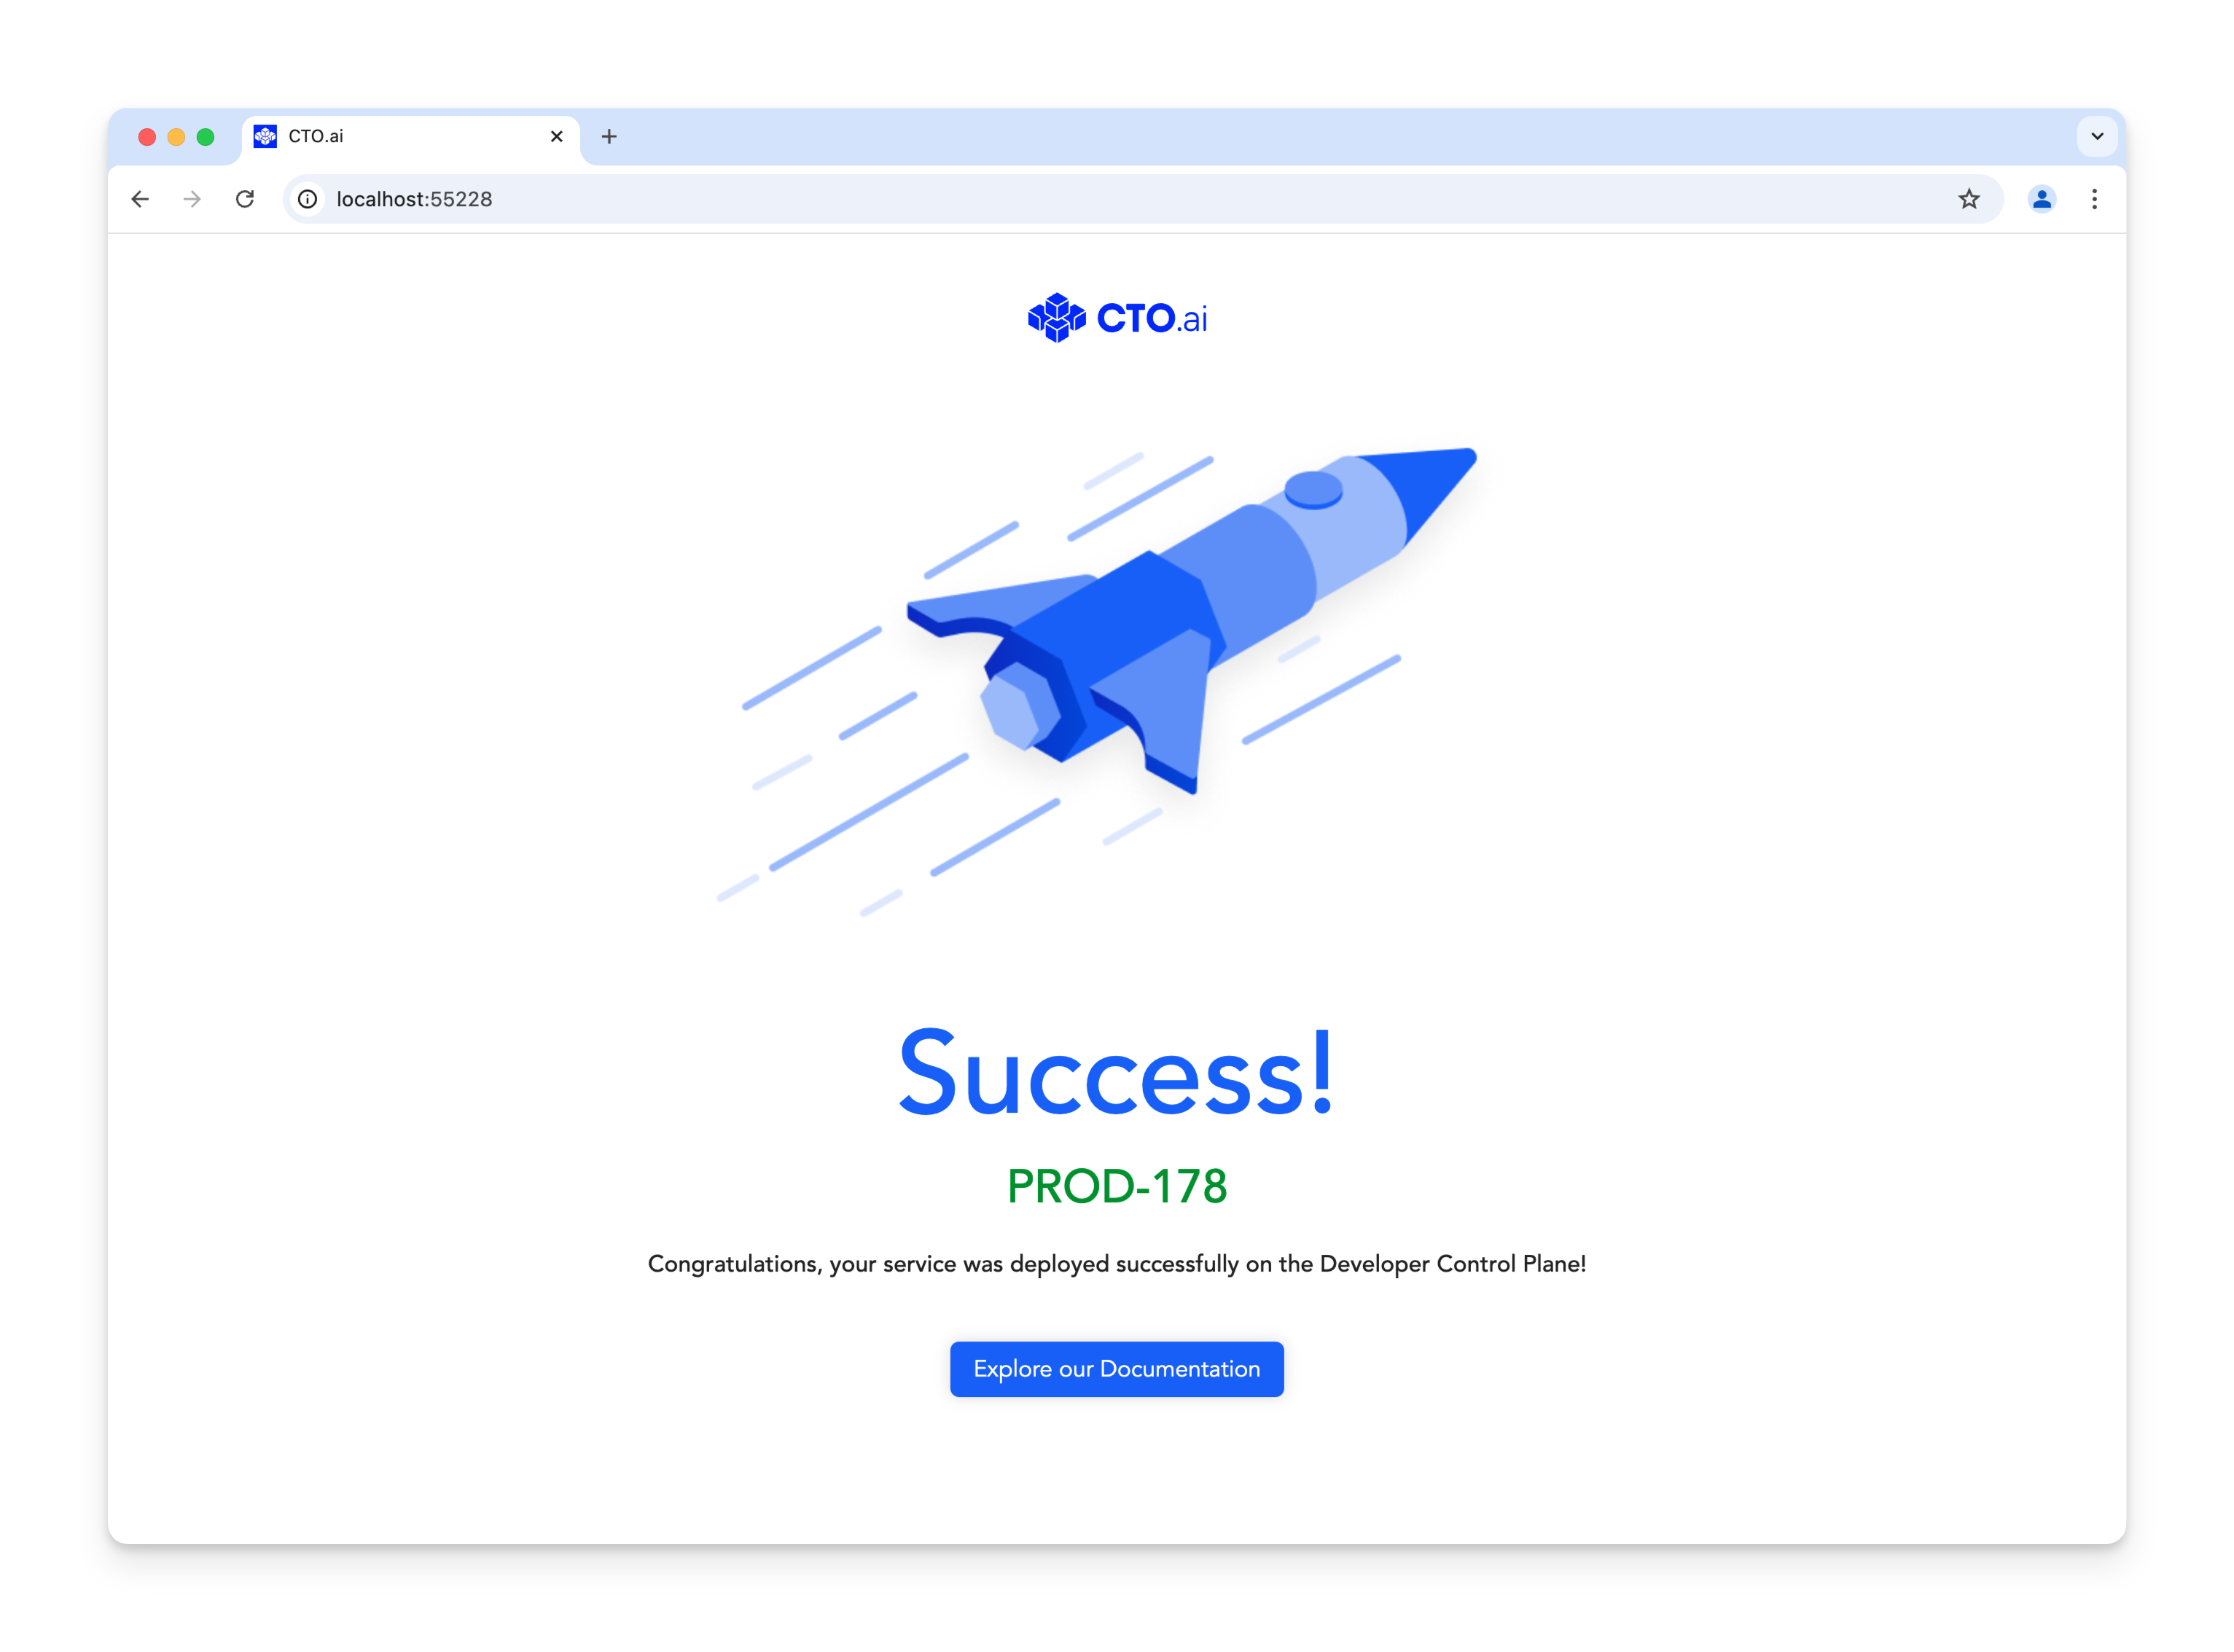
If you keep “Open in browser” selected, Lens will open a new browser tab with the deployed application forwarded to your local machine:
View the Configuration
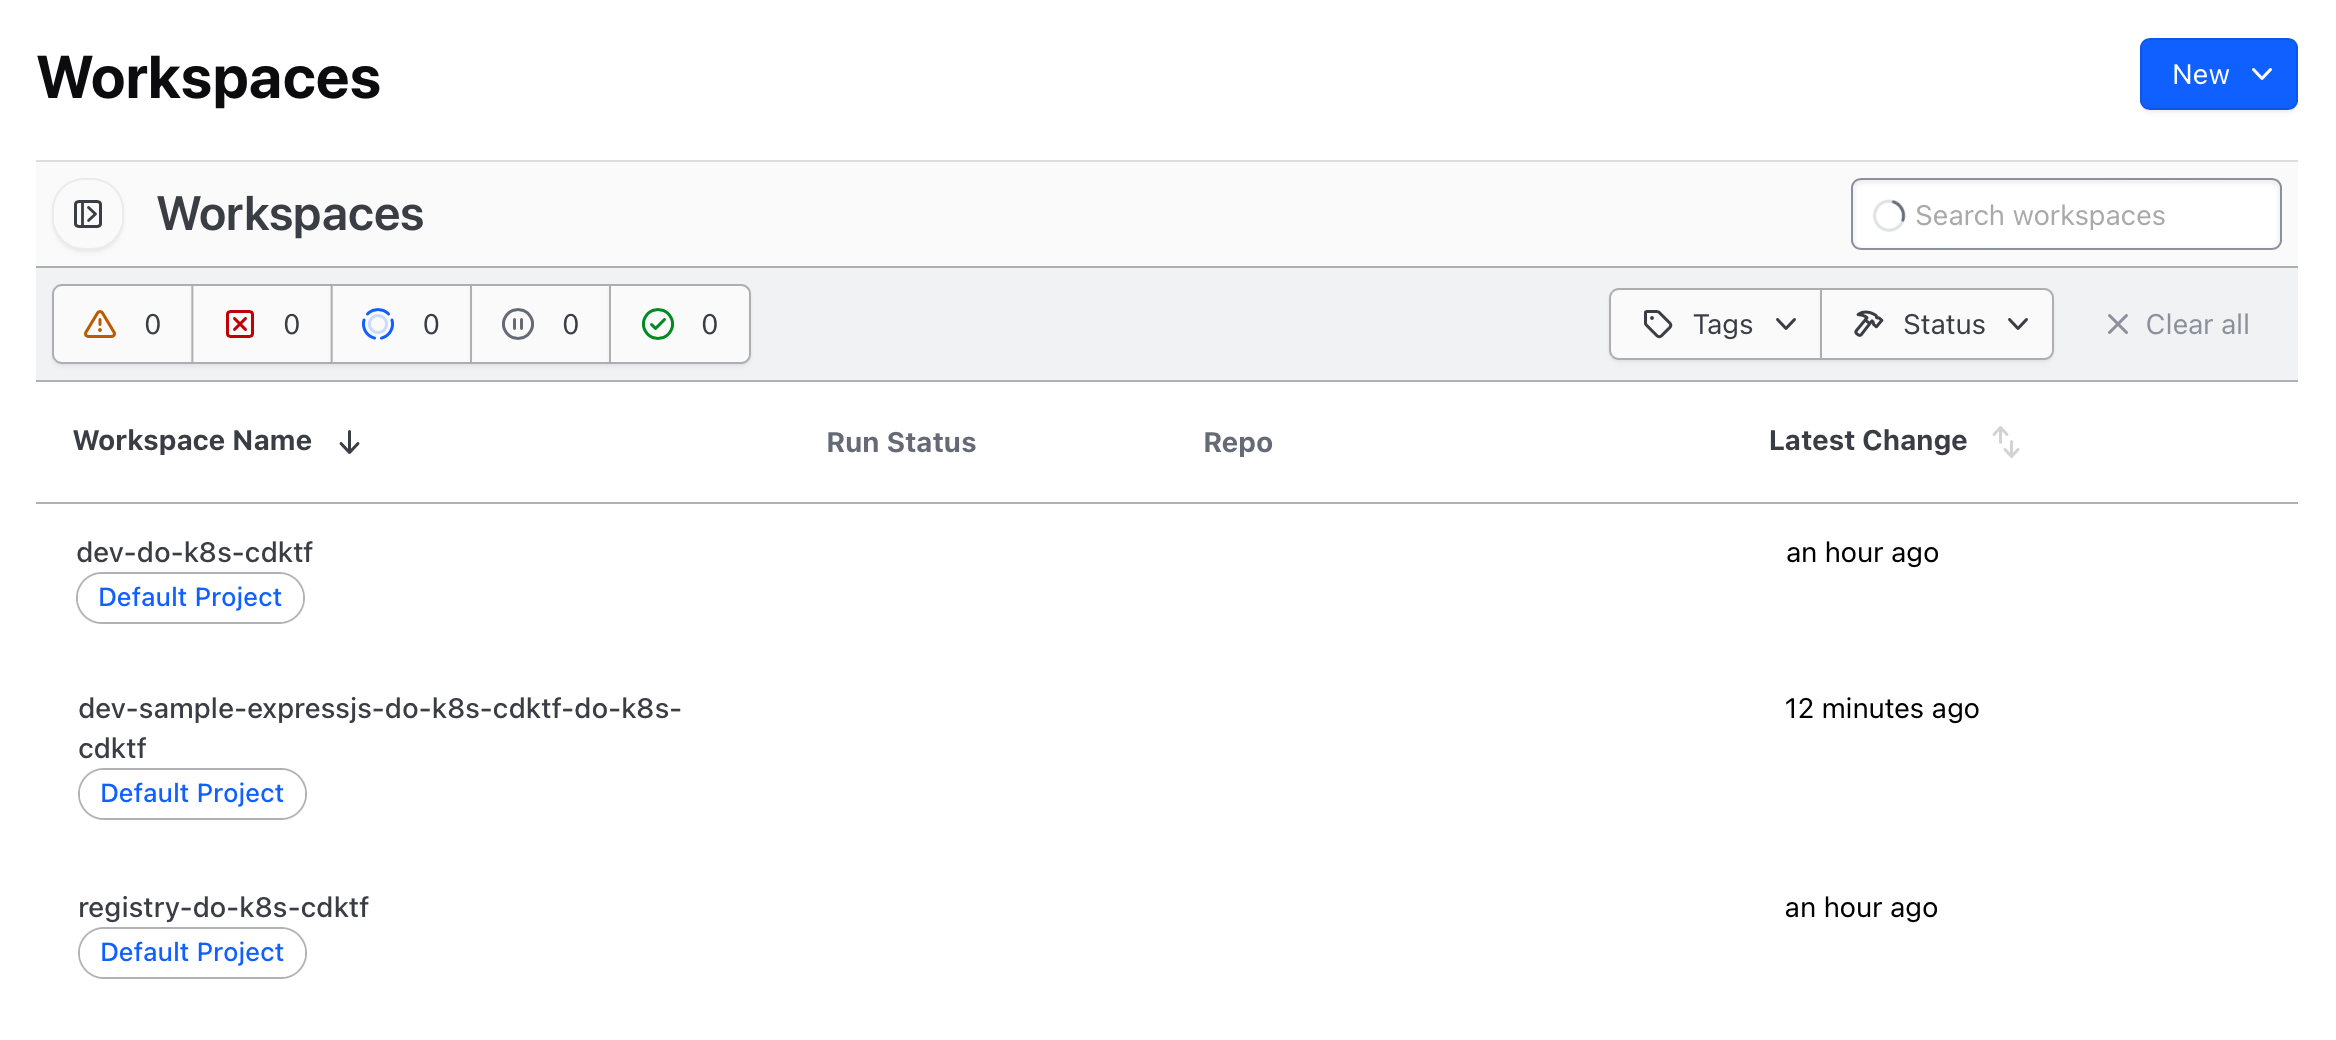
Through the HCP Terraform dashboard, you can view the configuration of the resources that were deployed to your DigitalOcean infrastructure:
Destroy the Cluster
To destroy the application that was deployed previously, you can run the ops run . command, then select the destroy-do-k8s-cdktf workflow to run. After you enter the name of the environment you want to target, select that you want to destroy the service:
To destroy the entire cluster, run the destroy-do-k8s-cdktf workflow and select the cluster option: