
Tutorial: Build an Op
Time required: 1 hr
Prerequisites:
- Git + GitHub account
- The Ops CLI
- MacOS or GNU/Linux Operating System
Proficiencies:
- Shell / Command Line
- NodeJS
- Typescript
- Git
▶️ Introduction
This tutorial will teach the main concepts of the Ops Platform so you can learn to develop Ops. As a learning tool, we will use an existing real Op called the Resume Generator Op, which lets a user to create and deploy a resume website on serverless technologies.
Have you already installed the Ops CLI?
If you have not yet installed the Ops CLI, or run an Op from Slack, please read our Getting Started guide before you proceed with this tutorial.
Why would you want to build an Op?
The Ops Platform is a toolset that allows teams to streamline and accelerate their DevOps using Slack and the Command Line. The Ops Platform is made up of building blocks called Ops, where each individual Op represents one DevOps workflow. Ops are created by you (or by the community), and can accomplish any task using your unique tool-chain and infrastructure.
Ops can do many things, but some popular examples are:
- running deployments on different platforms
- provisioning and maintaining Kubernetes clusters
- generating analytics and surfacing them in Slack
- managing user access to various systems
With Ops like these, you also get easy sharing, secure secret management, and portability between environments—just to name a few.
What will I learn?
This tutorial will walk you through building a realistic Op piece-by-piece—7 steps in total. Each step should take around 8 minutes to complete, and will teach you about a key part of the Ops Platform. By the end of the tutorial, you'll have learned to deploy, integrate with external APIs, handle user IO, and how to manage secrets and config. We won't cut any corners or omit any details—it's all here to see!
Follow along, and watch the Op come to life.
Seven short steps
▶️ 1. Configuration
▶️ 2. SDK
▶️ 3. User Input
▶️ 4. Secrets
▶️ 5. The Op Container
▶️ 6. Events & Metrics
▶️ 7. Publishing
What are we building?
We will build a resume generator.
Once generated, our resume will look something like this:

You can interact with this resume right now on the demo site, to get a preview of what it will be like.
We are going to name our resume generator "Resume Generator Op"—because it's an Op that runs on the Ops Platform.
To pull this off, we'll tie together a few technologies—GitHub Pages, GitHub Actions, Gatsby Templates, NodeJS, and Typescript. The Resume Generator uses GitHub combined with GitHub Pages and GitHub Actions to upload and host a resume. The resume itself is defined using a GatsbyJS template. All the Ops code is written in TypeScript, and we'll make use of the Ops NodeJS language support. You don't need to be familiar with all of these to follow along—we'll walk you through it.
When the Resume Generator Op is finished, the end-user can run the Op to get their resume on the web in just 10 minutes. This will be a completely serverless experience.
▶️ 1. Configuration
To make this tutorial fun, we've created a git repository that contains portions of resume generator code which you will help us fill in. Different segments of the tutorial are stored on different branches in the repository. We'll walk you through each part and show you what needs to be added to make the Op work. For an extra challenge, try to figure out what is needed before you read our solution!
First, clone the repository, cd to the cloned Op's folder, and then checkout step-1 so we can follow along the code together.
git clone https://github.com/cto-ai/resume-generator.git
cd resume-generator
git checkout step-1
In this folder you will find two important configuration files: ops.yml and Dockerfile. The Dockerfile allows you to customize the Ops container according to the standard features provided by Docker. The ops.yml file is specific to the Ops Platform. It contains metadata and parameters that change the way your Op behaves. For example, whether the Op can be published privately or publicly. Now, let's see what is missing from this code and make some changes to fill it in.
💡 Change 1: Compile the Op in the container (Typescript)
The code you are looking at in the repository you cloned is written with Typescript and requires compilation before running it. To make it work, you need to add a line in the container that will run our npm build step. You can see the details of the npm build step defined in the package.json file. Add this line to your Dockerfile
# ./Dockerfile

# Step 1: the Op is using Typescript and needs to be compiled
RUN npm run build
💡 Change 2: Build container with official image
To use SDK 2.0 or above (which enables the Op to run in Slack), the final container of the Op must contain our essential SDK components, available in our official images listed here. Because our op is using NodeJS, we need to update the indicated line with the corresponding official image for NodeJS:
# ./Dockerfile

# Step 1: the final container must be built with one of the official images
FROM registry.cto.ai/official_images/node:2-12.13.1-stretch-slim
Good job!
💡 Change 3: Make it public
We've fixed up the Dockerfile, now let's take a look at ops.yml. Open ops.yml and identify the comments and TODOs marked with Step 1. Can you guess what those flags do, and what values they should have? Go ahead—try guessing the right answers!
This Op was built to be universal and public, so we have no specific or sensitive information built-in. To configure the Op so that it can be published publically, set the public flag inside ops.yml to true:
# ./ops.yml

# Step 1: the Op should be public
public: true
💡 Change 4: Run index.js from the right path
The run flag inside ops.yml defines the command that is executed when the Op is started. In our case, we have updated the Dockerfile with a step that compiles the Typescript code to the lib folder (as per the configuration inside tsconfig.json). We are also setting the working directory in our final container to /ops, which means we can deduct the correct command and path for our run field:
# ./ops.yml

# Step 1: the Op should run the built index.js file from the correct path
run: node /ops/lib/index.js
💡 Change 5: Enable Slack
The remote flag inside ops.yml determines whether the Op is compatible with Slack (also note that sdk: "2" is a requirement for having an Op run in Slack).
If we were building an Op limited to CLI usage, we would set the remote flag to false, however our Op is meant to run just fine in Slack:
# ./ops.yml

# Step 1: the Op should be enabled for running in Slack
remote: true
Great job configuring this Op! See all the changes we made in this step here.
Consult our Configuring Ops doc for more details.
▶️ 2. SDK
The Ops SDK gives you access to utilities that help build automations for CLI and Slack:
- rich interactions for your Ops users, such as prompts, spinners, and progress bars.
- manage secrets and configs on a team-wide basis
- track metrics about your Op usage and the key events that happen in your workflow
- many more!
The Ops SDK has language support for NodeJS, Python, Golang, and Bash, and we plan to support other languages soon.
Now that we're on a new step of the tutorial, let's update our branch. Don't worry about saving your previous changes (unless you want to!).
git restore .
git checkout step-2
If you want to take the Ops Challenge, search for the comment "Step 2" to find hints, and then try to figure out it out on your own before moving on.
For Step 2, we must ensure we correctly install and import the NodeJS SDK in the Op codebase.
💡 Change 1: Install the NodeJS SDK
To use the NodeJS SDK, we need to install the @cto-ai/sdk npm package into our NodeJS Op. In the root folder of the Op, run npm install @cto-ai/sdk, which will update your package.json and package-lock.json.
// ./package.json

"dependencies":
  {
    "@cto.ai/sdk": "^2.1.4",
    ...
💡 Change 2: Import ux and sdk modules
These can be imported from the @cto.ai/sdk package. In our main file, where we put all the logic to make our Op do magic, we need to ensure that we import the ux and sdk modules, so that we can use their utilities. Don't worry if you don't see yet where we'd be using them and why; we'll be covering this in the next steps! 😃
// ./src/index.ts

// Step 2: import the `ux` and `sdk` modules from the @cto.ai/sdk package
import { ux, sdk } from "@cto.ai/sdk";
And that's it! We can import and use the modules in any file. See all our changes this step here.
Our SDK documentation has more information.
▶️ 3. User Input
We mentioned earlier that the SDK allow us to build rich and powerful user interactions, such as:
- prompting the user for a variety of input types (simple text, lists, checkboxes, Y/N, passwords and secrets, etc.)
- giving our Op users feedback as time-consuming tasks are developing with simple printed messages, spinners, or progress bars
- adding a dash of colour to the data we display in the CLI, or building rich formats with tables, trees, etc.
Now that we're on a new step, let's update our branch again.
git restore .
git checkout step-3
Search for the comment "Step 3" to find hints.
Now, we will be leveraging the utilities from the NodeJS UX module to create a couple of simple prompts and display some helpful information to the Op user.
💡 Change 1: Print info using ux.print
As captured in the Features section of the Op's readme, this Op offers two options for deploying the resume on Github Pages, and the user is prompted to pick one.
Back to our main file, we are generating a short informational message to tell the user about the two possibilities before we prompt them to make a choice, using the generateInfoSiteTypes helper function. Once we have the message generated, we can use ux.prompt to display it to the user. Note that ux.prompt only accepts one argument, so this is why we are first constructing our message in our helper function, by interpolating multiple strings and even using some colour to highlight parts of it in the CLI, with the helps of ux.colors.
// ./src/utils/config.ts

const {
  colors: { bold, cyanBright, bgBlueBright }
} = ux;

...

export const generateInfoSiteTypes = (user: string) =>
  `\\n💡  Your online resume can be deployed on Github Pages either as your user site ${cyanBright(
    `\\`${user}.github.io\\``
  )} or as a project site ${cyanBright(`\\`${user}.github.io/resume\\``)}.`;
// ./src/index.ts

const infoSiteTypes = generateInfoSiteTypes(githubUserName);

// Step 3: print out the generated info message using `ux.print`
await ux.print(infoSiteTypes);
💡 Change 2: Prompt for social media handles
You can prompt for social media handles by exporting an array of question objects.
Before the Op deploys the user's online resume, it will customize it using information from the user's Github account, as well as some input the user has to offer while running the Op.
We need to prompt the user for their Twitter and LinkedIn handles, so we can update the links on the social media icons under their resume bio.
We are defining our prompts inside a separate file src/prompts/index.ts . It's worth taking a look at how we are building the siteType prompt. The user is presented with just two options, but in the future we may want to add more. For that reason, we should allow them to use the keyboard to type the value and narrow down the list. The autocomplete prompt type provides this feature—it is a more powerful version of the list prompt type.
// ./src/prompts/index.ts

export const getSiteType = (user: string): Question<{ siteType: string }> => {
  return {
    type: "autocomplete",
    name: "siteType",
    message: "How would you like your online resume to be deployed?",
    choices: [`${user}.github.io`, `${user}.github.io/resume`]
  };
};
To get the user's social media handles, we need to create two prompt objects of type input. Note that we are also defining some default values here. They will only come into effect when the user runs the Op in the CLI because they aren't supported in Slack.
// ./src/prompts/index.ts

// Step 3: export an array of Question objects to prompt for social media handles
// the prompts should have the following names: `twitter`, `linkedin`
export const getSocialMediaHandles: Question[] = [
  {
    type: "input",
    name: "twitter",
    message: "What's your Twitter handle?",
    default: "janedoe"
  },
  {
    type: "input",
    name: "linkedin",
    message: "What's your Linkedin handle?",
    default: "janedoe"
  }
];
💡 Change 3: Pass question objects to prompt
Pass the array of Question objects to prompt for social media handles to ux.prompt.
Now that we built our two prompts, we can go back to our main file and leverage ux.prompt to make the prompts show up for the user!
// ./src/index.ts

// Step 3: pass the array of Question objects to prompt for social media handles to `ux.prompt`
const socialMedia: SocialMedia = await ux.prompt(getSocialMediaHandles);
That's it for this step! See all the changes we did in this step here.
To see other UX utilities that we've used in this Op, check the src/utils/github.ts file. Pay particular attention to ux.spinner , which lets our user know that the Op is running while we wait for the GitHub API.
You can read more about our UX modules here:
- NodeJS UX, NodeJS UX prompts
- Python UX, Python UX prompts
- Golang UX, Golang UX prompts
- Bash UX, Bash UX prompts
▶️ 4. Secrets
Our Ops Platform adopters are using the platform to build powerful automations around their developer workflows, which often times involve integrations with other developer tools and cloud platforms. Token-based authentication is the most common way of securely integrating with these platforms.
To enhance our user's security, the Ops Platform lets you store sensitive information at the team level. You can use the default secrets store we provide your teams, or you can connect to your Hashicorp Vault provider. Your team members can then use the secrets in their Ops, but without having direct access to them.
More details are available on the Secrets Management documentation page.
Time for the next step! Let's switch to the next branch:
git restore .
git checkout step-4
Search for the comment "Step 4" to find hints.
In this step, we show you how to retrieve a secret.
💡 Change 1: Retrieve the secret token
The token is saved under the key GITHUB_ACCESS_TOKEN. You can access it using sdk.getSecret.
For this Op to automate the creation of the repository and the deployment on GitHub Pages for the user, as well as retrieve user information from their GitHub account and use it to customize the resume, it requires the user to provide a GitHub access token. As documented in the Op Requirements section, the Op expects to have access to a secret defined in the active team under the key GITHUB_ACCESS_TOKEN. Saving the token as a secret can be done in a few seconds using the CLI (see detailed documentation in the Op Readme).
ops secrets:set -k GITHUB_ACCESS_TOKEN -v <VALUE>
Now, back to the main file in the Op codebase. To retrieve the set value, we can use sdk.getSecret and pass the key under which we saved it. This will return an object with the same key, which will hold the desired value. Further down in the file, we are passing the token to our getGithubClient utility function, which will return us an authenticated client that we can use for all subsequent calls to the Github API.
// ./src/index.ts

// Step 4: retrieve the token saved as secret under the key `GITHUB_ACCESS_TOKEN` using `sdk.getSecret`
const { GITHUB_ACCESS_TOKEN } = await sdk.getSecret("GITHUB_ACCESS_TOKEN");

...

const github = await getGithubClient(GITHUB_ACCESS_TOKEN);
const { userFullName, userEmail, githubUserName } = await getUserGithubInfo(
  github
);
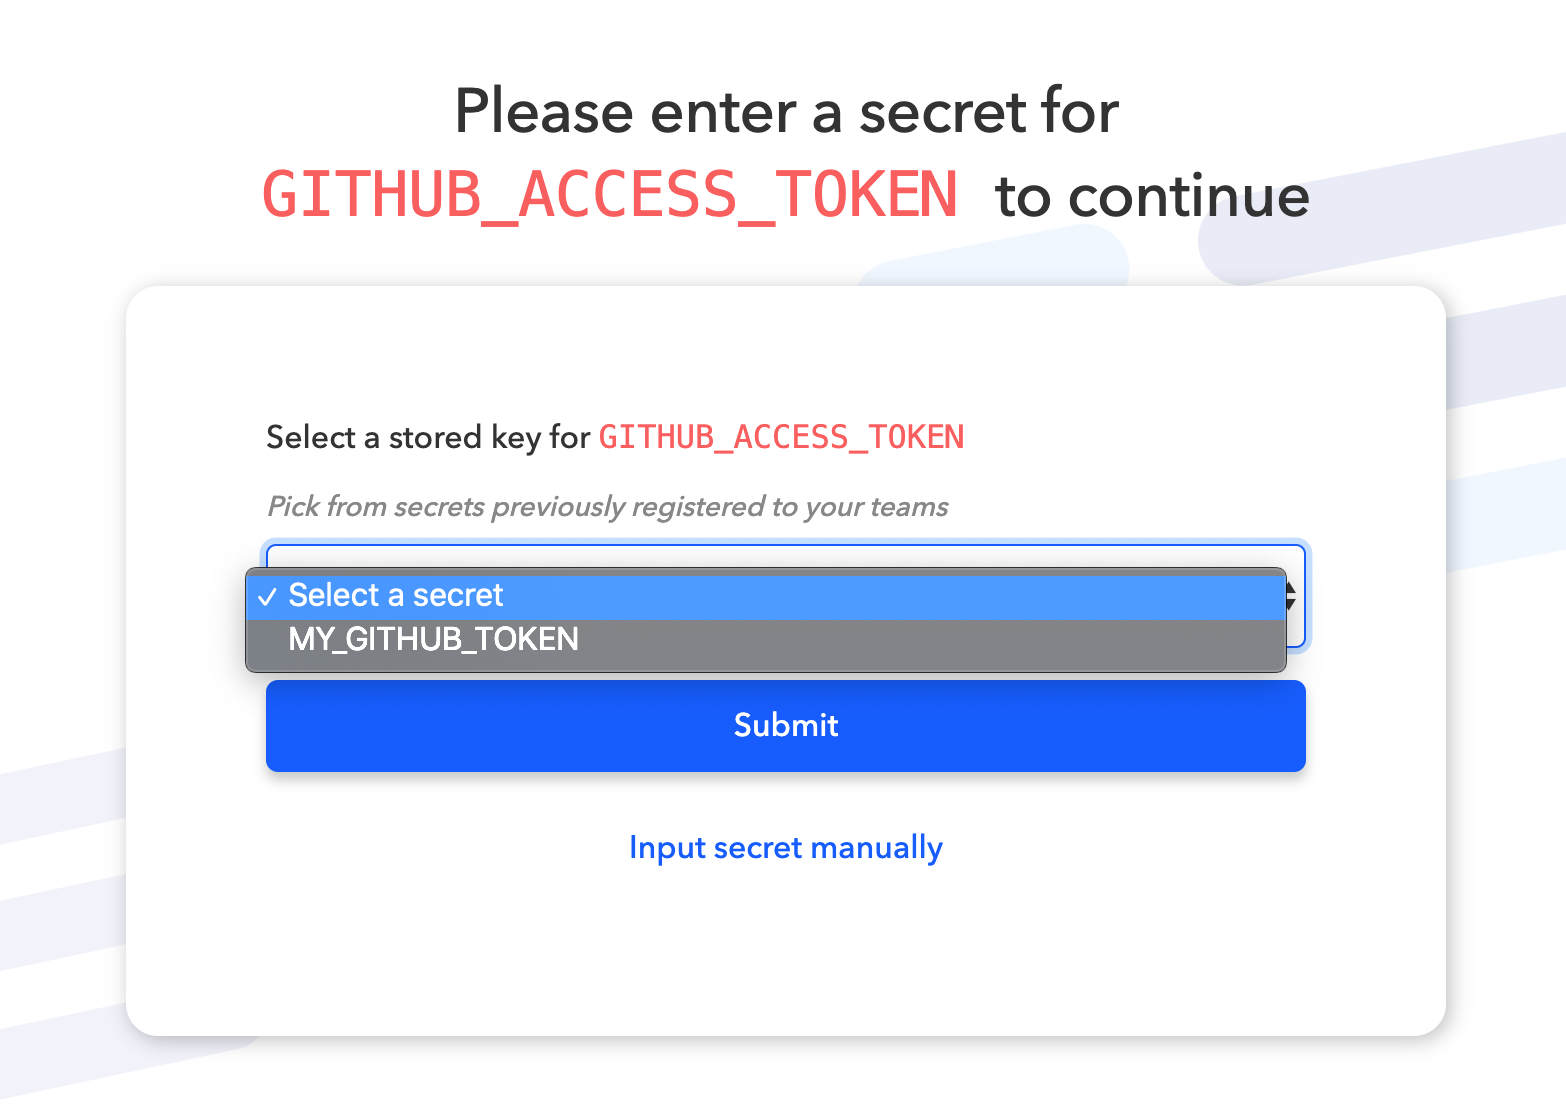
If no secret with that key is found in the active team where the Op is run, the user will be prompted to either input a one-time use value (discarded once the Op has finished running), or select a secret saved under a different key from the list of all secrets available in the team.
That's it for Step 4. That was easy, right?! See all the changes we did in this step here.
Consult our Secrets Management documentation for more details.
▶️ 5. The Op Container
Developers need to use various CLI tools and commands in our daily workflow. When we're ready to Opify such a workflow, we can research and see if we can replace running those commands with API calls or by using a specific SDK or library. Sometimes, however, that is not possible—or it may not be efficient.
We can automate running commands inside our Op containers, as long as we have all the dependencies installed (usually done as part of the build process, inside the Dockerfile). Then, we can use sdk.exec to run the commands and inspect the stdout and stderr.
In Step 5, we will use sdk.exec to built two utility functions inside src/utils/pExec.ts that we can use in our Op codebase to run shell commands inside the container and, if needed for debugging purposes, inspect the stdout and stderr. After that, we'll see how we can use the sdk.log when running the Op on the CLI to log useful information to the console in a standardized way (unsupported for Slack).
Checkout the step 5 branch:
git restore .
git checkout step-5
Search for the comment "Step 5" to find hints.
💡 Change 1: Execute the command
Pass the command to sdk.exec to execute it.
In order to retrieve the template of the online resume, customize it with the user's input and then push the final code to the user's newly created repository, we are running git commands inside the Op container using the utility function mentioned earlier, as can be seen inside src/utils/git.ts.
// ./src/utils/git.ts

const configGitLocally = async ({
  projectName,
  githubUserName,
  userEmail
}: GlobalGitConfig) => {

...

try {
    await pExec(
      `cd ${projectName} && git config --local user.name "${githubUserName}" \\
        && git config --local user.email "${userEmail}" \\
        && git config --local commit.gpgsign false`
    );
  } catch (error) {
    ...
For this change, we want to make sure that the pExecWithLogs utility function also works as expected, because that one would be helpful to use when something is not going as expected and we need to debug and understand what the effects of the command are. We will update the indicated line to use sdk.exec.
// ./src/utils/pExec.ts

// Step 5: execute the `command` by passing it to `sdk.exec`
const { stdout, stderr } = (await sdk.exec(command)) as {
  stdout: string;
  stderr: string;
};
💡 Change 2: Log error to console with sdk.log
Going back to our main file src/index.ts, if anything goes wrong in any of the steps we take inside the Op, we would like to make sure we log the error to the console before exiting. For that, we use sdk.log. Note that sdk.log is only compatible with CLI usage, and the output of it will not show up when running the Op in Slack. For Slack, if you would like your Op user to see any output, you must use ux.print.
// ./src/index.ts

try {
	...
} catch (error) {
  // Step 5: log the error to the console using `sdk.log`
  sdk.log(error);
This completes Step 5 of our tutorial. Just one more step to go through before we can actually build and run this Op! See all the changes we did in this step here.
If you would like to read more, check out our documentation for the NodeJS SDK: sdk.exec, sdk.log (or find the equivalent methods for other languages on the other SDK pages).
▶️ 6. Events and Metrics
Automating your workflows gives you more time to focus on the things that matter, like delivering value more efficiently or innovating your approaches. When you build an Op and share it with your teammates, you can automatically also get insights into how it's being used (how often, which users in your team are running it, etc.), as well as track specific events that occur as part of the automated workflow you just Op-ified by using sdk.track inside your Op. Our Team is currently working on enabling you with a way to visualize all of this data inside your Ops account dashboard. Reach out to our Support Team at [email protected] if you're excited about this and would like to find out more about how you can access these metrics.
In Step 6, we will use sdk.track to built a utility functions inside src/utils/analytics.ts that we can use in our Op codebase to track key events and associated metadata.
Time for a new step! Checkout the step 6 branch:
git restore .
git checkout step-6
💡 Change 1: Track events using sdk.track
As mentioned above, we built a small utility function track that allows us to easily track key events across our Op steps, while making sure we don't have to repeat the name and specific tags that identify our Op. Inside this function, all we need to do is call sdk.track with the correct tags and metadata about each event.
// ./src/utils/analytics.ts

const trackingTags = ["track", "cto.ai-official-op", "resume-generator"];

// Step 6: track events and associated metadata using `sdk.track`
await sdk.track(
  trackingTags,
  metadata
);
💡 Change 2: Call track to record completion
Now that we know we can use our track utility function, in our main file, let's make sure we track the successful completion of the Op and also record the Github username of our user and the project name (which will inform us on whether the user has opted for a user or project site).
// ./src/index.ts

// Step 6: call the utility method `track` to record the successful completion of the Op
// make sure you also record the `githubUserName` and `projectName` the Op was used with

await track({
  event: `Op Completed Successfully`,
  githubUserName,
  projectName
});
💡 Change 3: Call track to record failure
Similarly, let's make sure we record any unfortunate event that caused our Op to not complete successfully. Just because we don't know what to expect inside the error message (as it could be coming from multiple sources), we recommend using JSON.stringify to ensure we send a valid Javascript object, otherwise the event might not get tracked as expected.
// ./src/index.ts

// Step 6: call the utility method `track` to record the failure of the Op
// make sure you also record the stringified error object `JSON.stringify(error)`

await track({
  event: `Op Failed`,
  error: JSON.stringify(error),
});
That's it for this step! You are now ready to enjoy the fruits of your labour in our final step (Step 7), where you'll get to build, publish, and run the Op to generate your online resume! See all the changes we made in this step here.
Feel free to check out all the other parts in the code where we use our track utility function to track relevant events and metadata as the Op flow progresses. Read more about how to use this feature in our documentation for the NodeJS SDK: sdk.track (or find the equivalent methods for other languages on the other SDK pages).
▶️ 7. Publishing
We've filled in all the missing code, and our Op is now ready to go! Now that's exciting! 🎉
In this final step, we will show you how to build, publish, and then share your Op with your teammates. They will reap the rewards of your automation! After this step, you will be able to run this Resume Generator Op both in your CLI, as well as in your Slack workspace.
Let's make sure you are signed into the platform. This command will open a browser window and prompt you for your credentials.
ops account:signin
Once signed in, retrieve your basic account information by running ops whoami. This will also display your current active team. If you haven't created a team, this will show the default team that we generated for you when you registered.
ops whoami

# Example output
Email: [email protected]
Username: janedoe
Team Name: janedoe
A user can create as many teams as they need, invite other users, and publish only those Ops they want to share with those members of those teams. Keep in mind that secrets are managed at the team level, so the same Op will have access to different secrets for different teams.
You can publish this Op to your personal team, or you can create a new team and invite members using the ops team commands.
# Change the active team
ops team:switch

# Create a new team & automatically switch your active team to it
ops team:create -n dev_friends

# Invite people
ops team:invite -i [email protected],[email protected]

# Explore other team management commands
ops team
Now that we've settled on a team, we will build and publish our Op. Before sharing our work with the rest of the world, we should make sure it works as expected by building it and running it locally. From inside our Op directory, we can use the run command to start the Op on our machine inside a Docker container, and interact with it in the CLI, in the context of our active team.
ops run . --build

# Equivalent commands:
ops run . -b
ops build . && ops run .
Everything worked just fine, right?! This means we are ready to publish! Pay attention to the version field inside our ops.yml and ensure all the information about the Op is correct before publishing it. Once you publish a version to a team, you will not be able to publish the same version again (even if you remove it so that your teammates cannot accidentally find out about it and run it, that version number is locked forever). Also, every time you publish or remove a version of an Op, you will be prompted to provide a descriptive changelog message.
# Make sure you build the latest version of your Op
ops build .

# Publish it
ops publish .

# Example output:

Provide a changelog of what's new for resume-generator:1.0.0 →
✍️  Changelog: Initial release - Resume Generator v1.0.0

# Final output:

🚀 Publishing...

> Tag: 1.0.0
> Size: 2631
> Digest: sha256:46975e55538482aa11745af18648c2cd38dca4a1e46fc352984c53bbc4475b27

🙌 registry.cto.ai/public.dev_friends/13b7ea1d-8d45-4317-8781-1e5561ead00f:1.0.0 has been published!
🖥  Visit your Op page here: <https://cto.ai/registry/dev_friends/resume-generator> (<https://cto.ai/registry/dev_friends/resume-generator>)
And we're live! Now anyone in the team you published the Op to can run it. Note that we configured our Op to be public; public Ops show up in the Registry and anyone can run them without being part of our team. Private Ops, however, won't work unless the user running them is part of the team hosting the Op.
# Switch to the team and run just using the Op name
ops team:switch # select e.g. `dev_friends`

# Or run directly
ops run dev_friends/resume-generator
What about Slack, you ask? Easy peasy! Assuming you have already installed our Slack application by using the "Connect to Slack" button in your Ops account dashboard (or asking your workspace admin to install the app from the Slack marketplace), you should now be able to associate your Ops Platform account to your Slack username.
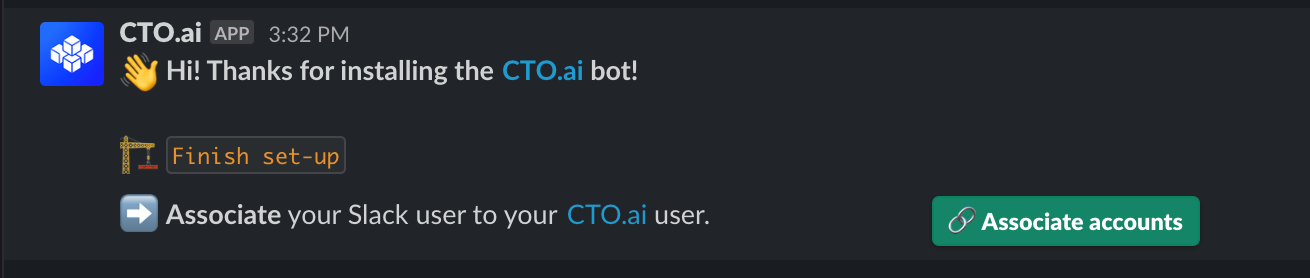
If you haven't yet been prompted for this when the App was installed, just open a DM with our CTO.ai bot and locate the "Associate accounts" button. Log in with your Ops Platform credentials. Keep in mind that, once you associate an account, you will not be able to re-associate your Slack user in that workspace with a different Ops Platform account.
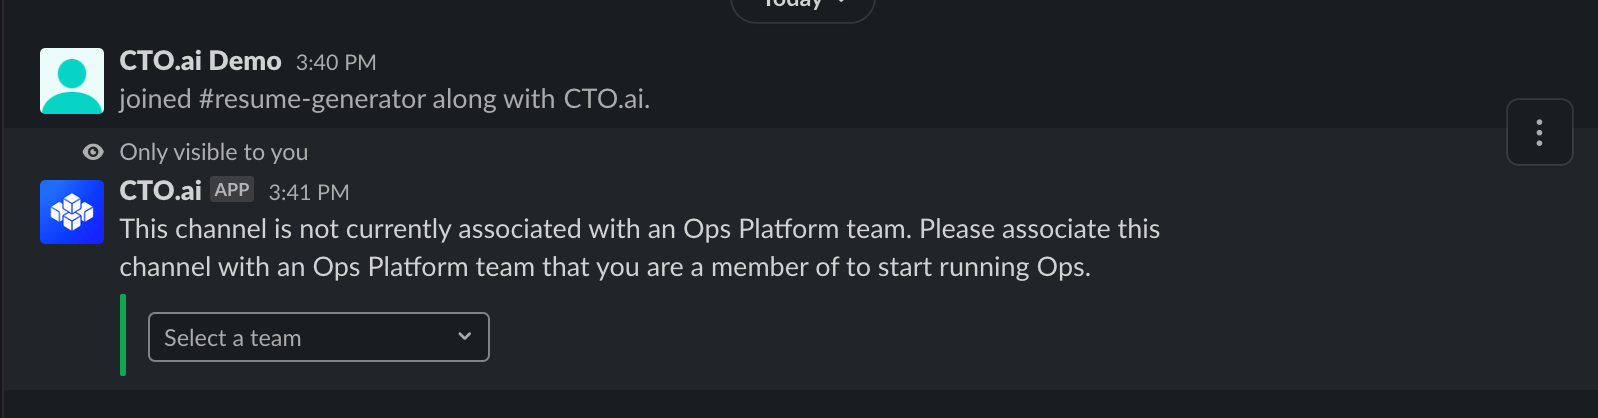
Once you have successfully associated your accounts, you can now pick a Slack channel to start running your Op and associate it to the team you just published the Op too. Go to your channel, and type /ops run; click on the dropdown and select the desired team.
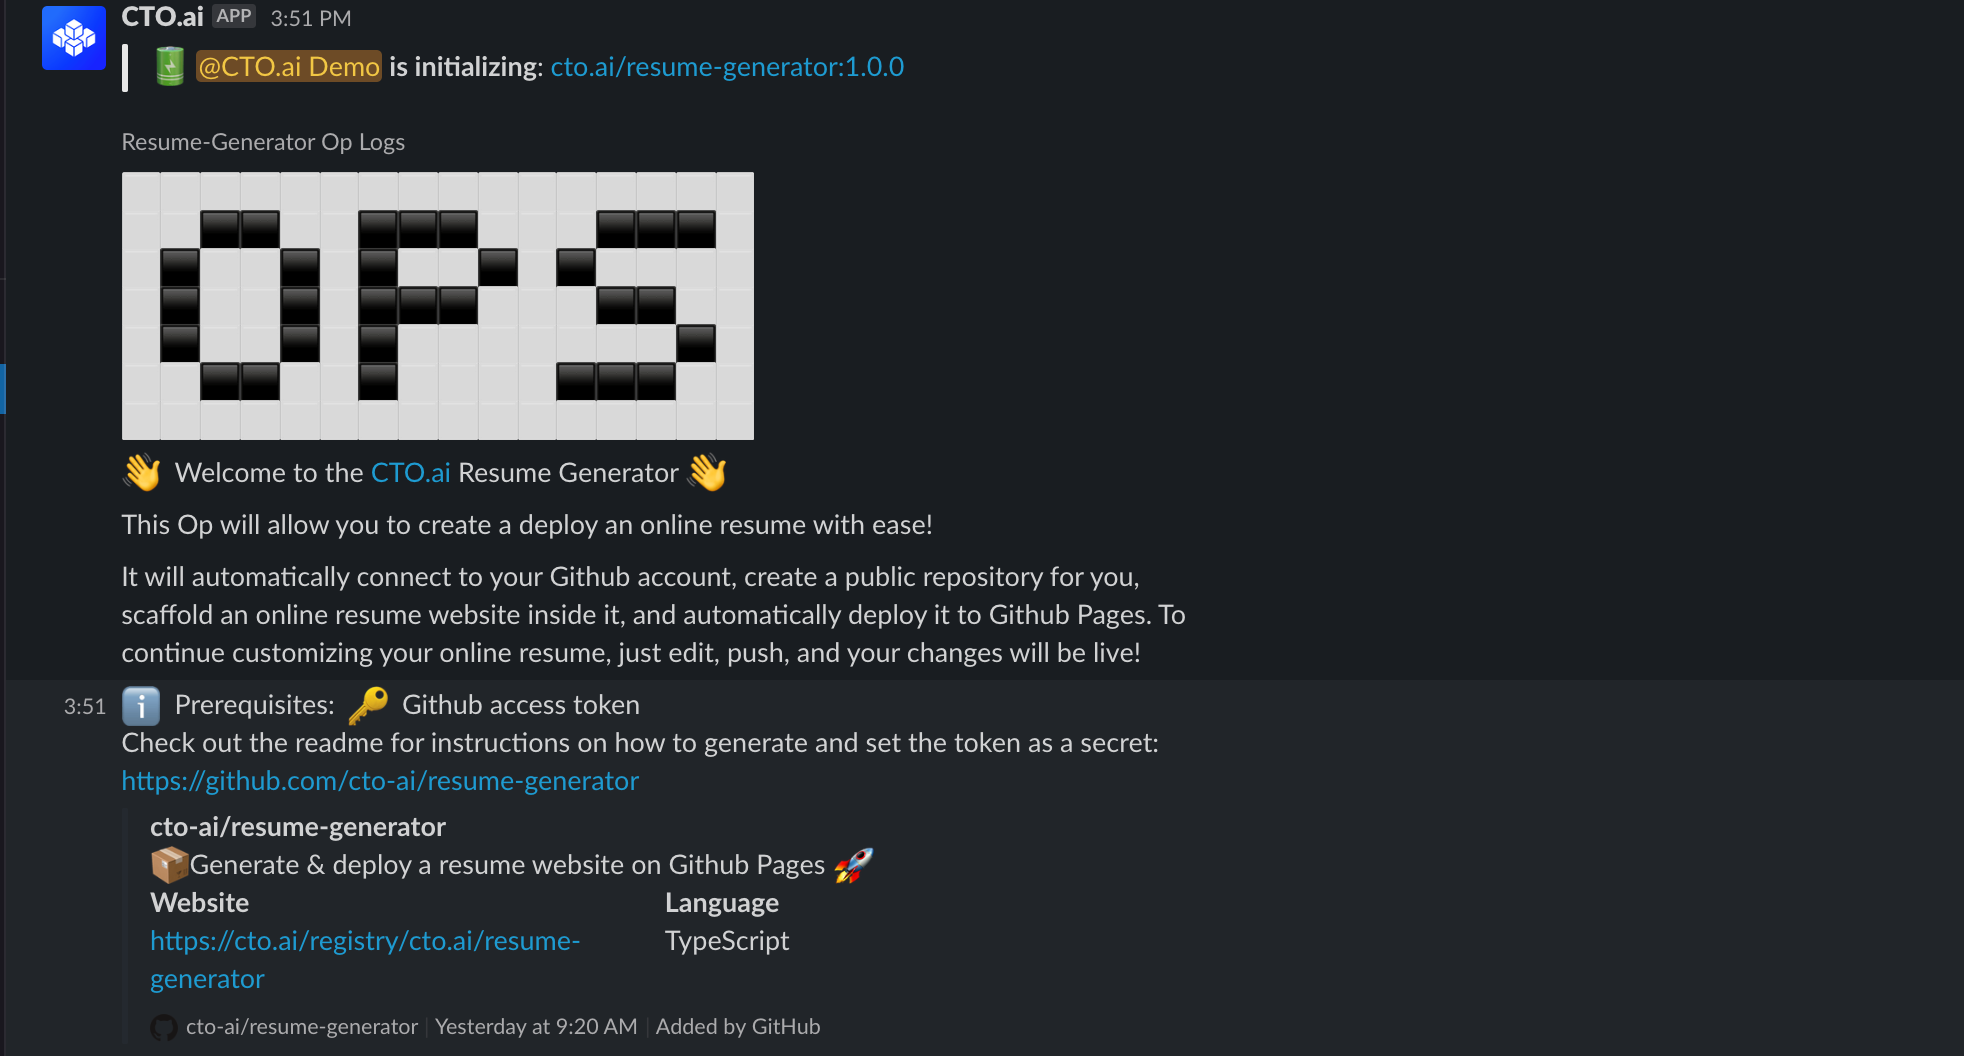
Finally, you can now go ahead and run your Op in Slack! Type /ops run resume-generator and enjoy!
That concludes our Ops Tutorial.
Thanks so much for trying out the Ops Platform!
🤔 Need help?
Have questions about something in this tutorial? We would love to talk to you on our Slack community.
Our Dev Team is available during business hours on our Slack Community and are eager to help developers use the platform to work better. Please bring your questions and give us a chance to help!
🚀 What's next?
- Take some time to dive deeper into our SDK documentation.
- Join our Slack community and share your feedback. We’d love to hear what kind of tutorials would you like to try next!
- Browse our Registry and get some inspiration on what you can build using The Ops Platform.
- Come back for more tutorials!